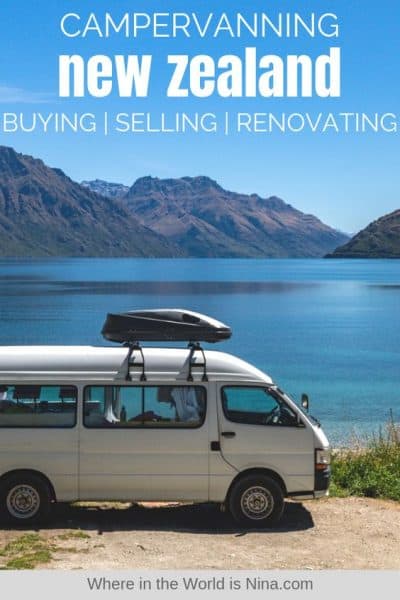
Campervanning New Zealand: Buying, Selling, Renovating, and Tips
Campervanning New Zealand in Birdie was one of the best trips I’ve EVER done in my eight years of traveling…
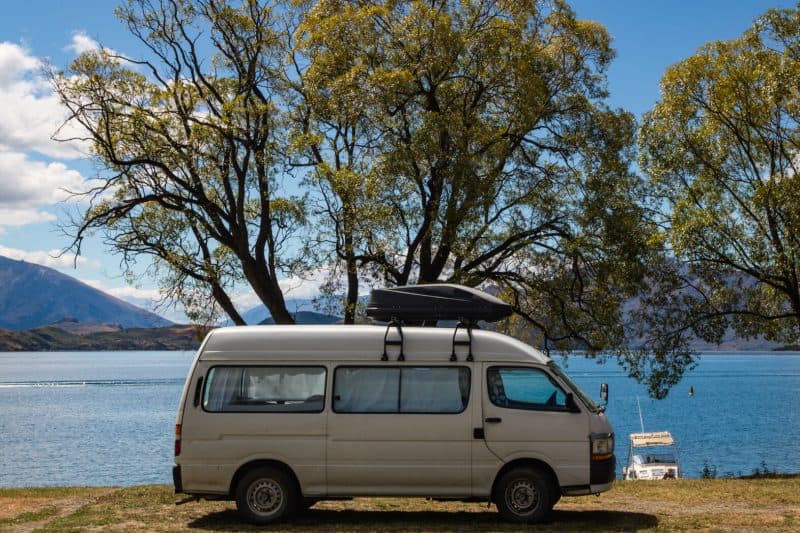
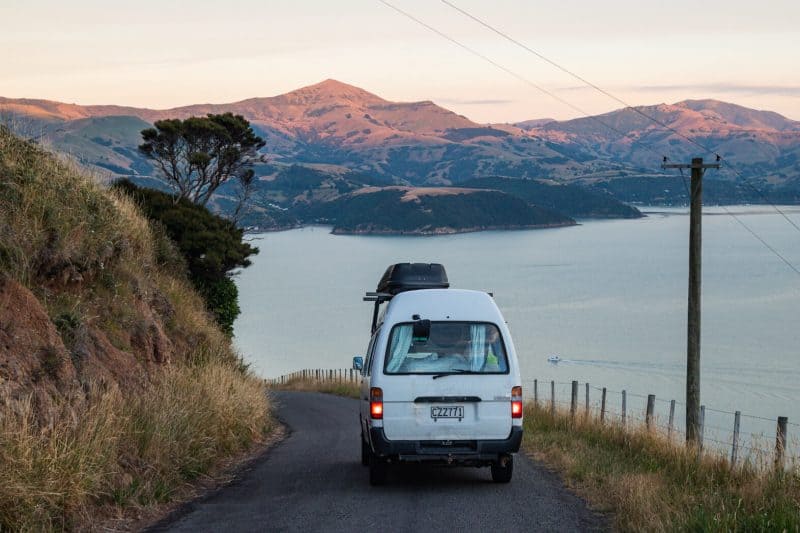
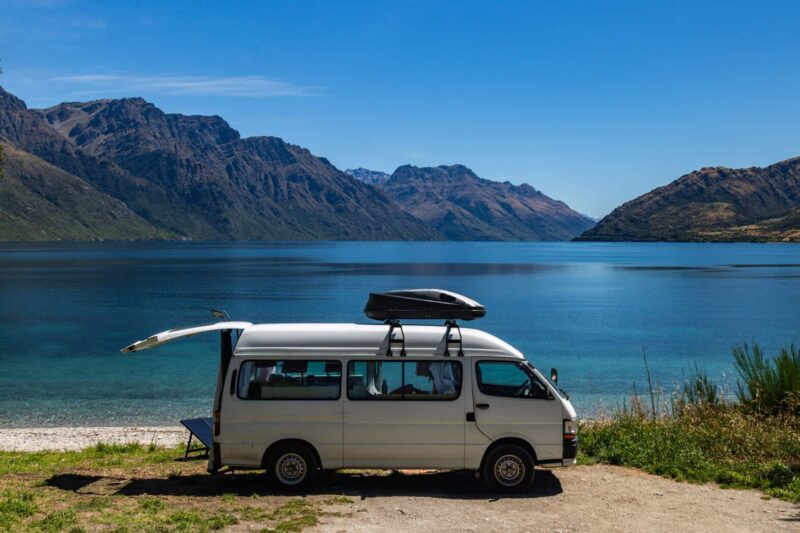
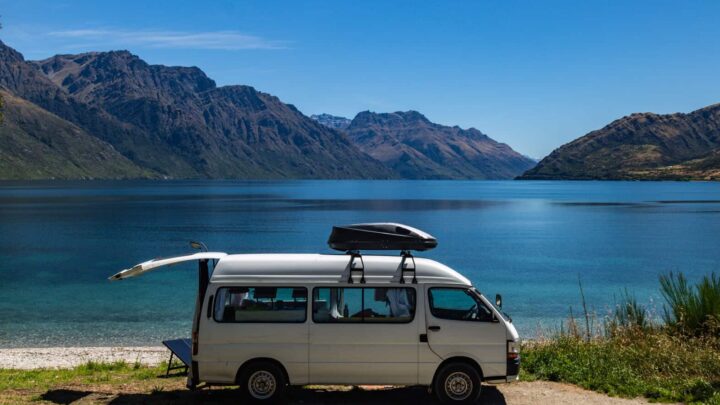
Birdie, our van, was the perfect van for us. She was spacious but not obnoxious to fit and maneuver places. She was warm and cozy, had tons of storage, and did well on gas.
She wasn’t fussy, didn’t break down, and took us to all the gorgeous corners that New Zealand offers.
Campervanning New Zealand is the best way to see it and if you’re thinking of doing it (I’m guessing that’s why you’re here?) then you’ve chosen the right post to read. Here, you have tons of information for purchasing your van, doing it up, selling it, and tons more tips on how to best do your van life here in New Zealand…
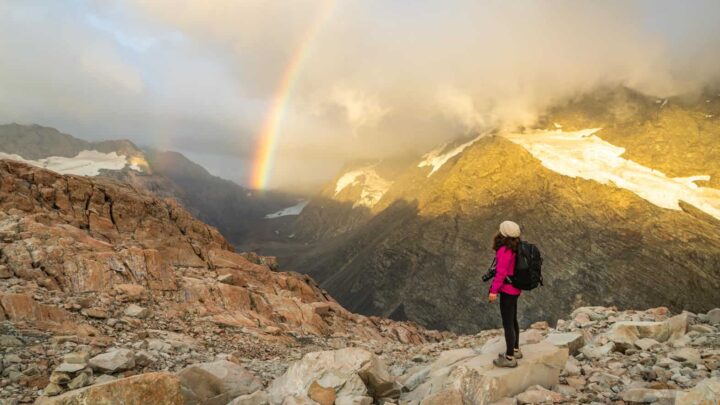
Busy? Click the picture to Pin this for later
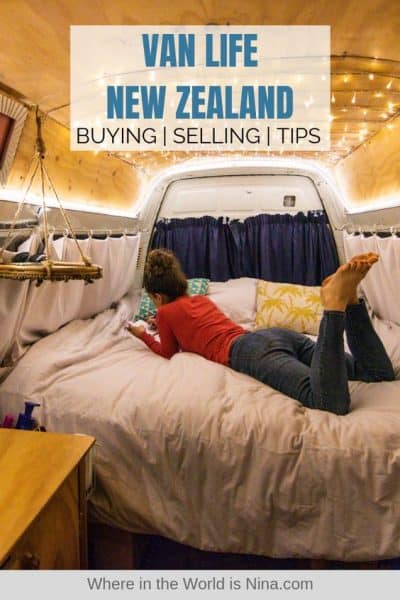
Table of Contents
- Campervanning New Zealand
- How to Buy a Campervan in New Zealand
- How Much Does It Cost to Buy and Renovate a Campervan?
- Campervan Insurance in New Zealand
- Getting a Self-Contained Campervan in New Zealand
- Tips for Campervanning New Zealand
- How Much Did We Sell Our Campervan For?
- How to Sell Your Campervan in New Zealand
- Costs for Our Campervan in New Zealand
- More New Zealand Travel Tips
Campervanning New Zealand
There’s A LOT going on here. After all, you’re about to purchase a vehicle in a foreign country, you’re about to drop a bunch of cash, this is about to be your home for a few months, and yeah… It’s a lot!
Luckily, it’s very easy to do all of this in New Zealand and with a few tips and some experience from a friend who has done it before (that would be me!), you should totally be fine.
Garrett made a MASSIVE video full of this info too if you’re more into a visual explanation:
*All numbers mentioned are in USD unless I state otherwise!
The conversion at the time of writing was $1NZD=$.65USD
How to Buy a Campervan in New Zealand
Let me preface by saying this is going to be campervan specific! The rules are pretty much the same if you’re buying a smaller car or even a larger RV! But a few things may not apply or may be different.
For example, a smaller vehicle wouldn’t be self-contained (too small), but a campervan like mine could be which opens more options for you, and a larger RV would already be self-contained since they are usually built like that… Little things like this may be different depending on the car you’re getting.
Oh, and don’t worry if you don’t know what self-contained means, I’ll get into that.
I think you get the point, let’s move along here…
Finding a Campervan in New Zealand
How does one go about finding a campervan in New Zealand? Luckily, it couldn’t be easier because you use this app every day… The most popular way to buy and sell campervans in New Zealand is through Facebook!
Crazy, right? Not really… What isn’t on Facebook nowadays?
This is how we got our van, and countless others do the same every day. Simply join any of the million campervan New Zealand Facebook groups and start shopping. There are even specific groups for big cities like Christchurch, Auckland, Wellington, and Queenstown.
Join the group, browse, meet up, buy. It’s that simple.
There are also sometimes “car shows” or meetups. Those are often posted in those same groups. It’s exactly what it sounds like; people meet up with their van they are trying to sell, people come around to shop for one… Done.
It’s almost scary how easy it is to buy a campervan in New Zealand, even the changing over of names couldn’t be easier (I’ll talk more about this below).
I like Facebook a bit better than meeting up at a show because I can SEE the person first. This helps me trust a bit more and I have a bit of a “connection” with them before I meet up to buy. It also helps to ask questions beforehand and not waste each others time.
If you’re looking for something a step up from a van, you can check out buying a motorhome in New Zealand.
Finding the Right Campervan: What to Look For
This is different for everyone but we had some musts, I’d make a list of must-haves and keep them in mind when shopping. This is about to be your home for a few months so you better love it!
For us, this list looked like:
- High top – we are living in this thing for too long to not have a high top!
- Long wheel based – Again, same as above plus we needed the extra space as we have more things than the average person, also, there’s two of us! This trip was also going to be months long, not weeks. We wanted SPACE.
- We wanted our kitchen INSIDE. We know New Zealand’s weather can get a bit crazy, we didn’t want to deal with having to cook pasta in the freezing rain while trying to block our burner from the wind… No thanks!
- We wanted a second battery. We didn’t want to deal with having to do it ourselves.
- We wanted a long table. We need this because we work online, and there are two of us, so this was a must, although, we were willing to let it go if there was space for us to make a longer one.
- It had to be self-contained (more on this below)
This was our list of MUSTS, and we got all of them! Of course, there were wishes… We wished to find a van with solar panels or one that was already aesthetically pleasing… Of course, the less work, the better but it’s not a reality to tick every box.
Be willing to make a realistic list of your musts, and then get a little flexible. This is your home, after all, so you have to be super comfortable.
Things to Know and Do Before Buying a Campervan in New Zealand
A scary and daunting process for anyone who doesn’t know a thing about cars, I know! I’m in this boat. Honestly, I would have been much more hesitant of buying a vehicle without Garrett; he can at least look at a few things and tell if they are in good condition. I have no idea what I’m doing…
All in all, there is a small risk. Just because it was excellent today, doesn’t mean something won’t happen in a few days after purchasing. This goes for any used vehicle you buy, anywhere.
The best precautions you can take are:
- Find a friend quick, and have them help you look a few cars over, buy them some beers and pizza as a thank you!
- Feel the seller out. What does your gut tell you? Listen to it!
- Check the main things: take a test drive. Does it make a weird noise? Is the steering “sticky?” Do the breaks squeak? Do the lights all work? Do they have their WOF up to date (more on this below)? Is the oil sludge, or does it look like it was changed recently? These are relatively easy things anyone can test, even car inept people like me!
- Ask the seller to meet you at a mechanic and eat the cost of whatever the mechanic will charge you. Better to lose a few bucks than a few thousand… Also, the seller might get scared and save you money. They may not want to meet up at a mechanic if they know something is wrong. Be sure to look up trusted mechanics as unfortunately scamming foreigners is good money for the local mechanics here. Ask in Facebook groups specific to the city you’re in and check Google reviews thoroughly.
Finalizing Your Campervan Purchase
It’s easiest to pay in cash and as I’ll explain below under ‘selling your van,’ things can get sketchy real quick when you do bank transfers.
Cash is the easiest. Go to an ATM 2-3 days in a row if needed since banks often have limits on how much you can take out. If anything, a half and half transaction is a bit safer too.
Once you have the keys, you’ll need to go to a post office and tell them you are looking to update the registration and switch it to your name. It’s a simple paper and a few bucks. Again, it’s SCARY how easy this process is!
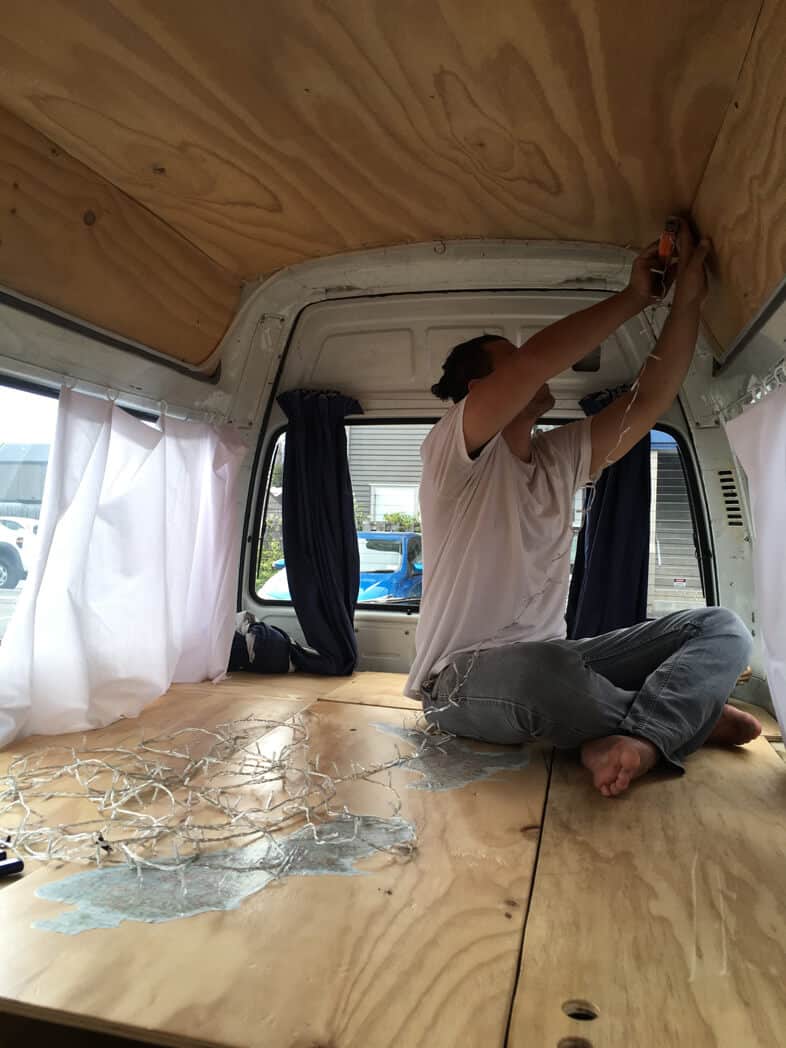
Renovating Your Campervan in New Zealand
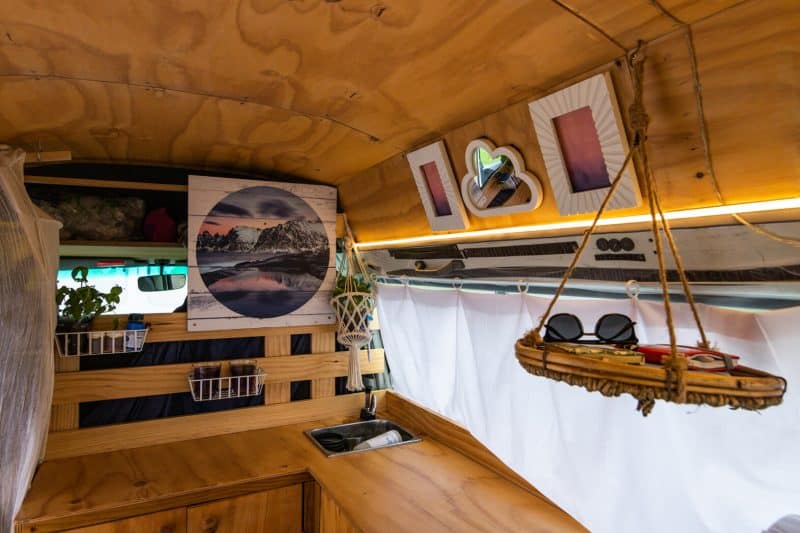
Ah, the fun part! This was my forte. I wanted nothing more than to get a van so that I could fix it up. And it’s precisely what I did.
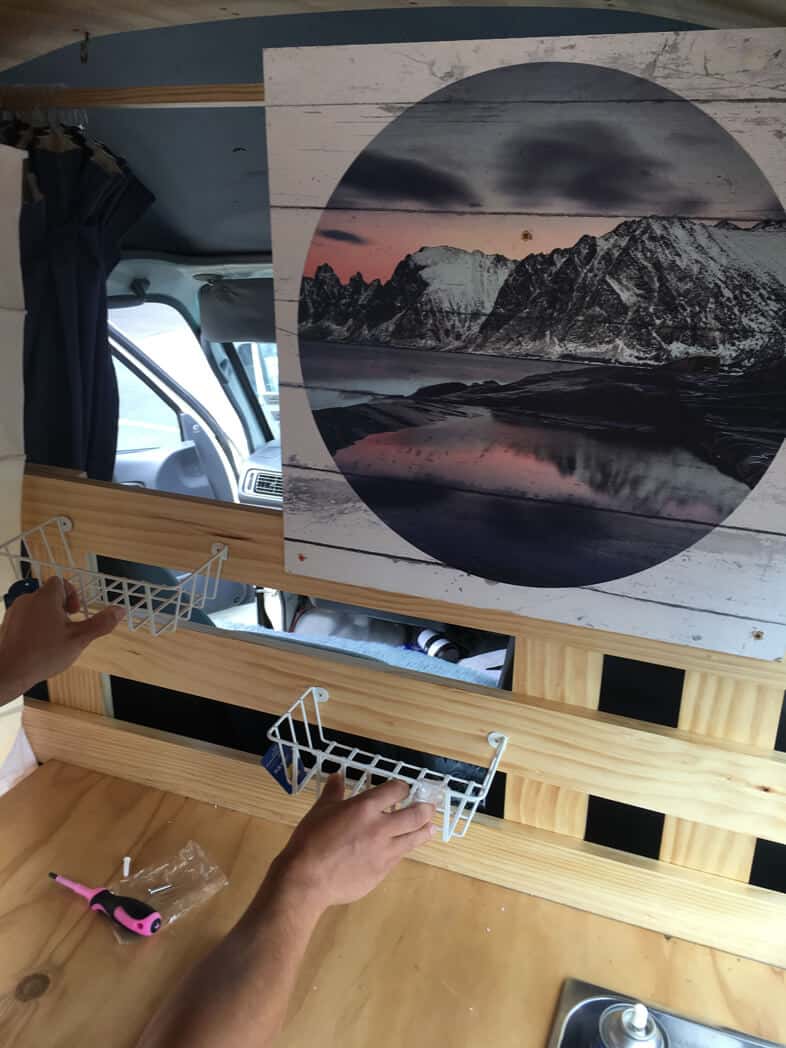
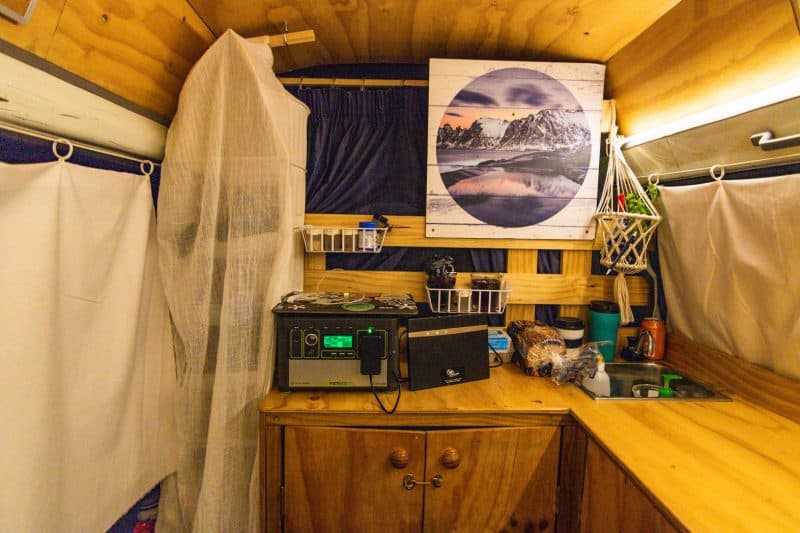
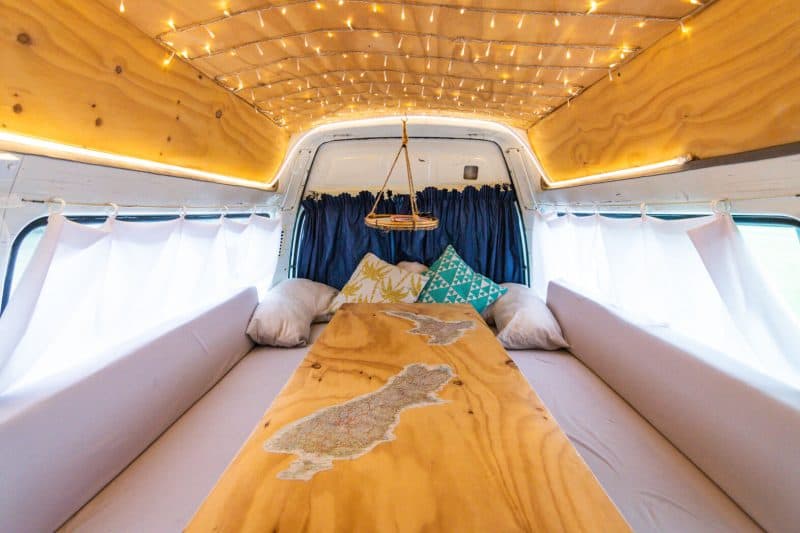
I will say, Garrett did help find the inspo piece, which was an obnoxiously large mountain photo that we fell in love with. We used this photo to help create the theme for the van and just rolled with it! (But otherwise, this van is mostly my masterpiece, mahahhaahha!)
Blues, greys, purples, and white were our colors, and in the end, I’m, so happy with the way it came out!
How did we do it? How much did we spend? How hard was it? How can you do it? Let’s break it down!
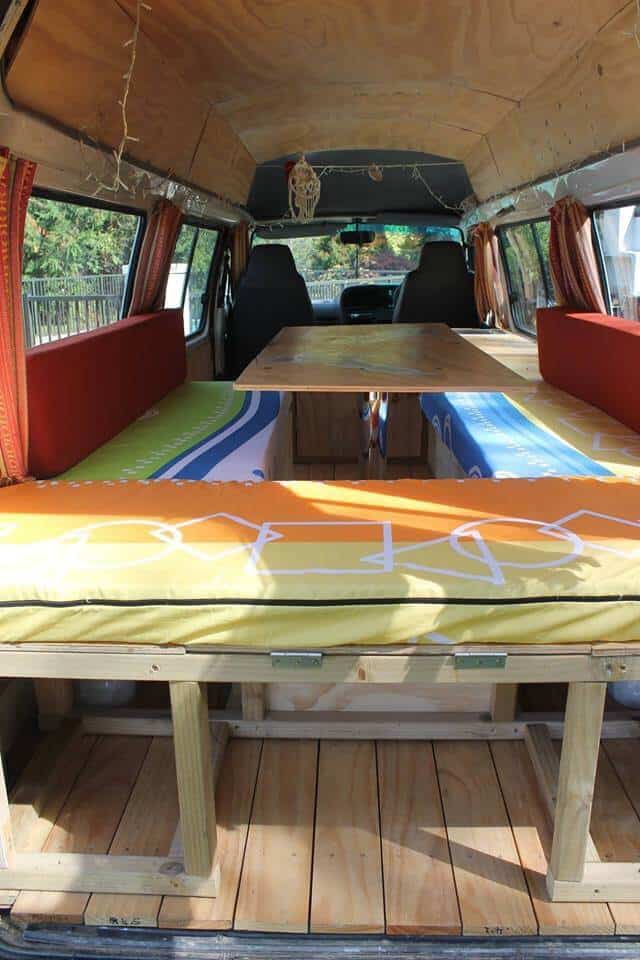
The Body of the Van
Well, let’s start with the main bones. Luckily, the van came decked out with a cabinet set up and a bed that turns into a table. But that’s about it.
I have to say though, we had ZERO interest in figuring this part out! It would be cool but just too much for us since we have jobs online to tend to… 🙂
So we decided to only look for campervans in New Zealand that had “good bones.”

We found one! While we saw plenty of other vans that were fully decorated, beautiful, and almost exactly what we wanted… If they missed a few critical points of ours (mentioned above), then we decided to pass on it.
We settled on this one that was pretty ugly to start but it checked all the boxes in terms of having a good set up and having the things that we couldn’t change like having a high top and long wheelbase.
How to Decorate Your Campervan
So where did we find the decor and how can you get your hands on cheap things to decorate your van with?
Luckily, again, it’s SO easy here. Op shops (second-hand stores), as they are called here, are everywhere around New Zealand and they are packed full of cheap things that would be perfect for decorating.

Almost everything in our van was bought from an op shop with the exception of a few bits that are just too hard to find there because we wanted something exact.
Pots and pans, our inspo picture, the “closet,” our blue curtains, candles, decor pillows, etc… All were bought at an op shop.
The things we had to buy at proper stores are:
- The wood for our wall and our above seat storage we got at Bunnings.
- Our matching shelves also bought at Bunnings.
- The white curtains and our gray cushion fabrics were bought at Harold’s in Christchurch. I can highly recommend them if you’re in Christchurch! It was the cheapest place I found with nice materials that you can make into something awesome.
- Other bits and bobs like our hanging platter thing and other crafty items we needed (like fabric glue and a large box of safety pins etc.) were purchased at Spotlight which is a great craft store to rummage through. The fabric was definitely pricer here though which is why I opted for Harold’s.
Definitely scour op shops and even pawn shops for other materials like a drill or a saw! We got our saw for $2 at an op shop. Always look there first, then buy full price if you can’t find it.
How to Organize Your Campervan
WELL. VERY VERY WELL.
No really, this is the most crucial thing when campervanning New Zealand because your trip will be a miserable mess without organizing first. I went psycho and organized for literally days on end…
A few days before leaving, then again for a few days while on the road. Why?
Because the way I organized the first time changed once I lived in the van. You start to notice what made sense before may not make sense when you’re actually in it. Give yourself a few buffer days to get this sorted from day one.
Things MUST have a home. There is no option. If you start putting things anywhere and everywhere, you will lose items quicker than you can put miles on your new van. It sucks.
After campervanning in Iceland, down the West Coast of Canada and the USA, and road-tripping in Morocco… Trust me, organizing is no joke. Take the time to do it.
My favorite solutions:
- Buckets of some sort. I put food and shoes in them.
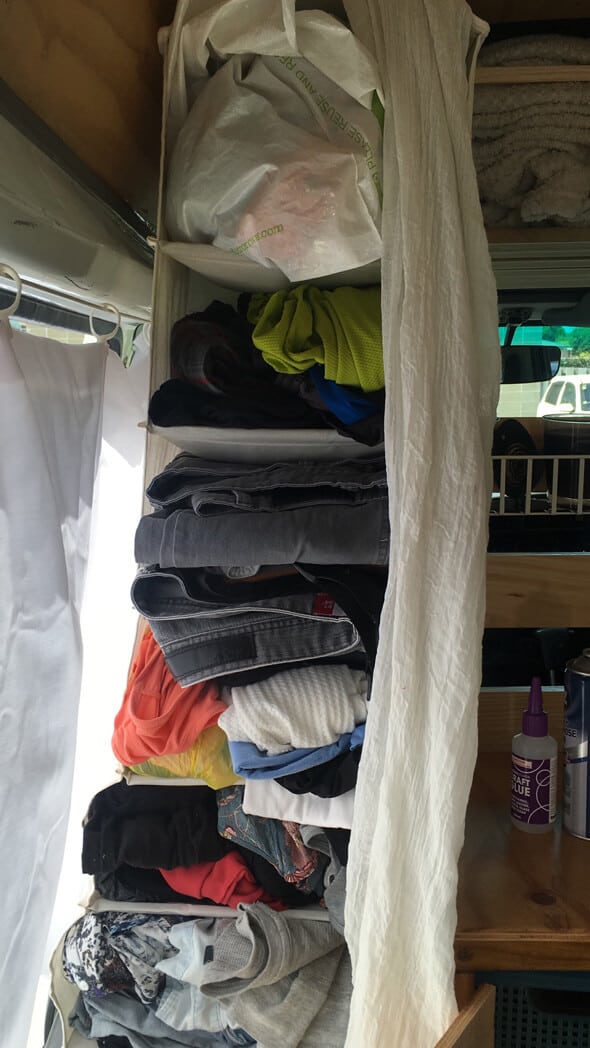
- A hanging closet. This thing is clutch. It holds *almost* all of our clothes. The extra pieces of clothing are in vacuum packs. (no judging! We live out of a bag and were here in summer and fall, so we needed extra weather appropriate clothing!)
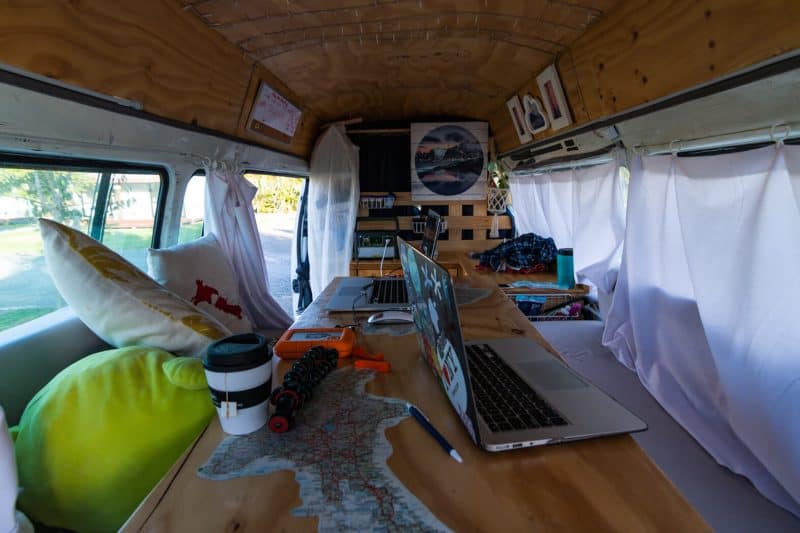
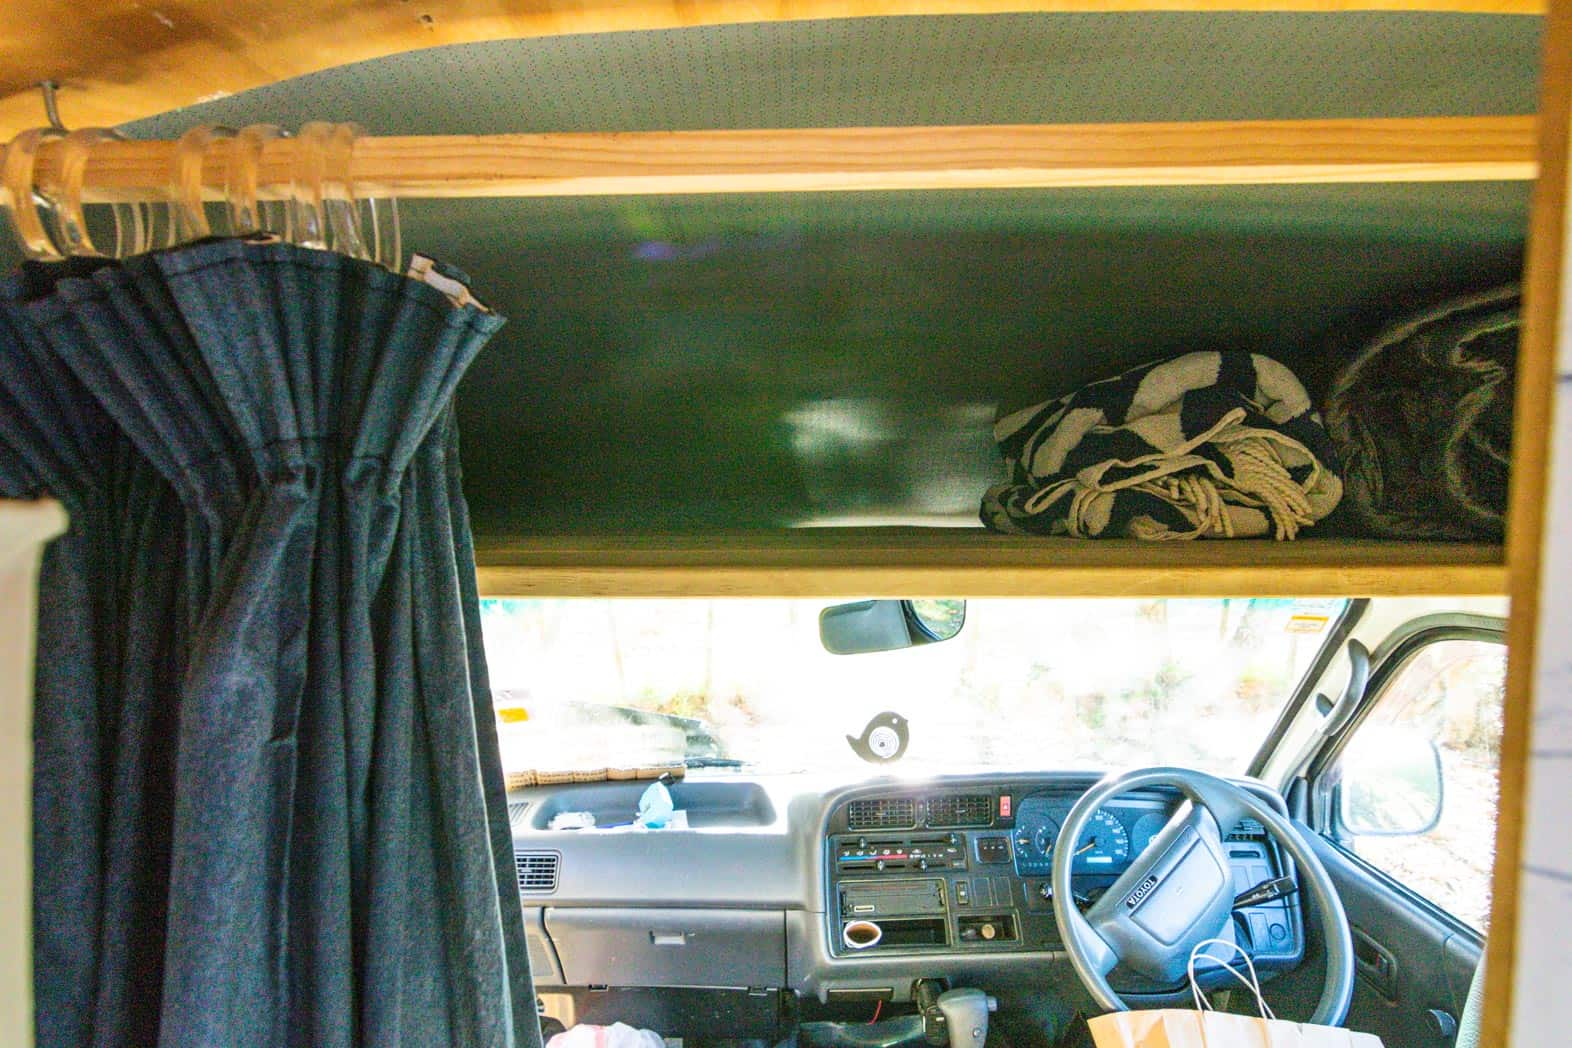
- If you have a high top, lay down some wood planks at the top. Otherwise, this space is wasted. It holds so much, and we didn’t have to do any drilling or anything! Just lay the wood and go. (Look at the pic above.)
- Boxes. Every time you leave Bunnings or a store, grab a box. Yes, it’s OK, you’re supposed to get a box instead of a plastic bag, so no worries. But grab a box that you can use. We used a few to put odds in the end in, our extra pillows (so they weren’t just laying on the bottom of the car floor), and to create a “safe space” for items, so they didn’t rattle around and get misplaced within our seat storage. It helps organize everything for FREE.
- Use bags and shelves. I HATE loose items; it’s a sure way to have things falling over and sliding around the twists and turns you’ll inevitably run into. Put stuff in bags, place items on racks… Life will be much easier while you campervan New Zealand this way.
How Much Does It Cost to Buy and Renovate a Campervan?
Well, this is quite a broad question but of course, an important one. This has many factors, what type of vehicle, how many miles, what it has inside, what it doesn’t have. Second battery? Self Contained? Needs work? High miles? How ugly is it? Are you starting from scratch?
Phew… There are a lot of things to consider, so I can’t answer this fully but here are some things to keep in mind…All of these things come down to what you can expect to pay…
Kilometers
How many does it have, how many do you think you’ll add and do you believe someone will buy it with that amount of mileage at the end of your trip? Lots to think about here.
Season & City
Oh, yes, seasons matters! There’s a lot to say here, aside from what season you’re buying and selling in, the location matters, and the type of car matters a lot too.
In winter, a 4WD and insulated vehicle would be better of course but in summer, someone might not care too much for this.
Christchurch was a decent place to buy a car.
Auckland is supposed to be the best place to sell. With that said, we didn’t want to buy here. First off, we wanted to start our trip in South Island and move north (to escape the cold).
And to sell, we decided there was TONS of competition in Auckland, everyone and their mom sells here (probably because it’s the cheapest to fly out of too) but this leaves you in a better position to sell elsewhere were competition isn’t so high. This was our strategy a least, and we sold very quickly in Wellington instead.
Lastly, we were selling in winter, winter is harsher in South Island, so selling our non-4W drive van was a bit easier in North Island. Our van was insulated though which was a big win when it came to selling in winter.
Then there’s what you can charge in summer compared to winter. Not as many people are coming in winter so you may have to knock a few bucks off. Otherwise, if you’re buying, you can find cheaper cars closer to winter. And then this begs a mention, do you want to be living in a van in New Zealand winter? And if so, which van will be most tolerable for you? TIP: An insulated one…
Seasons matter BIG time.
We would have got more for our car if we didn’t sell during off-season but we already knew we would get less and were OK with that.
Diesel VS Petrol
Which do you prefer/which is the cheapest/which lasts longer? Again, a lot to think about. I didn’t know much in this area, but Garrett did, thankfully, and he said he wanted a diesel only because they are built to last longer and have more life in them. Which is great considering you don’t want anything wrong to happen nor do you want a short life for resale value.
Diesel fuel is also cheaper HOWEVER there is a diesel fee to pay in New Zealand so it mostly evens out.
Making It a Home
As in, the bed, the kitchen, the benches…How much does it cost to make this a home?! Did you buy a car that came set up?
Luckily, our van came with the basics made, and it was great! This was the only option for us because we didn’t want to deal with having to buy all of that and play construction workers for a few weeks. The small renovation we did was enough.
Renovating It
All this costs money, don’t forget! As if you would, but seriously, it’s not that cheap to get this stuff together! The fabric was a bit pricey, we made at least 10-15 trips to Bunnings in 2 weeks, and it’s way more than you think if you have actually to build from the bottom up.
OK, so what are we talking here? A few hundred bucks? A few thousand?! How much did it cost to get our campervan in New Zealand ready for the road?
Total Car Cost and Renovation Breakdown
Here’s the exact break of our vehicle and the costs.
Campervan
Model: Toyota Hiace 1998
Bought with: 250,000 km
Engine: Deisel
Came with: Kitchen sink and counters, benches, and bed already inside. A 3 burner stove top, second battery and inverter, self-containment certification until 2021, random kitchenware, and a few “car things” like tools and oil.
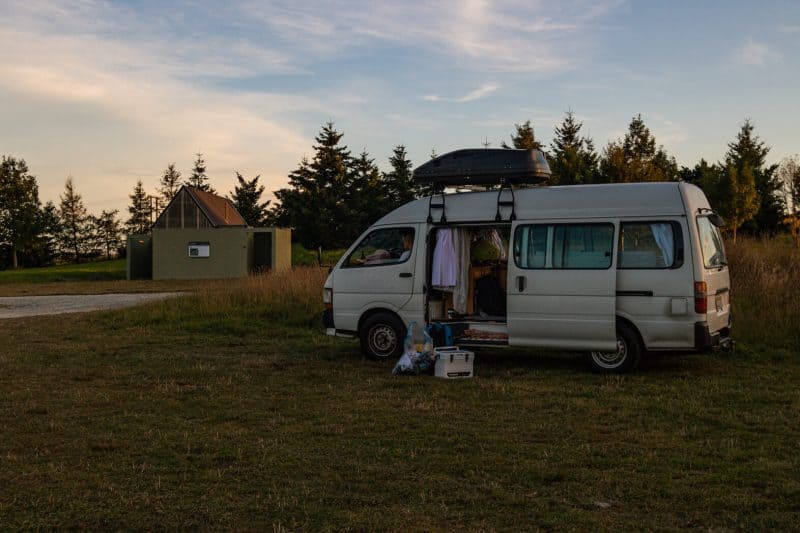
Other: It’s a high top and a long wheelbase giving us some much more needed space. It’s perfect and doesn’t feel too cramped (considering it’s a van!)
Ours also came with a top storage bin for sports stuff or extra items.
We purchased the vehicle in January of 2019. (This is high season in New Zealand)
Total campervan cost: $7000
Renovations
We built up the wall behind the kitchen, bought some shelving, I redid the curtains and the cushions (the foam was the same, just the fabric was replaced), a few pieces of decoration, random necessities like mugs, a good knife, mosquito screen, pillows, etc…
Total campervan renovation cost: $500
Others could spend less on renovating… The wood, curtains and cushion fabrics were some of the most expensive things we bought, but we wanted new stuff for our van.
This is about to be our home for the next 4-5 months; we wanted a decent van to be comfortable in and for it to be “ours.”
Making It Digital Nomad Friendly
We still work online! So we have to find a way to keep our stuff charged. So we got a Yeti 400 battery and Boulder 200 solar panel.
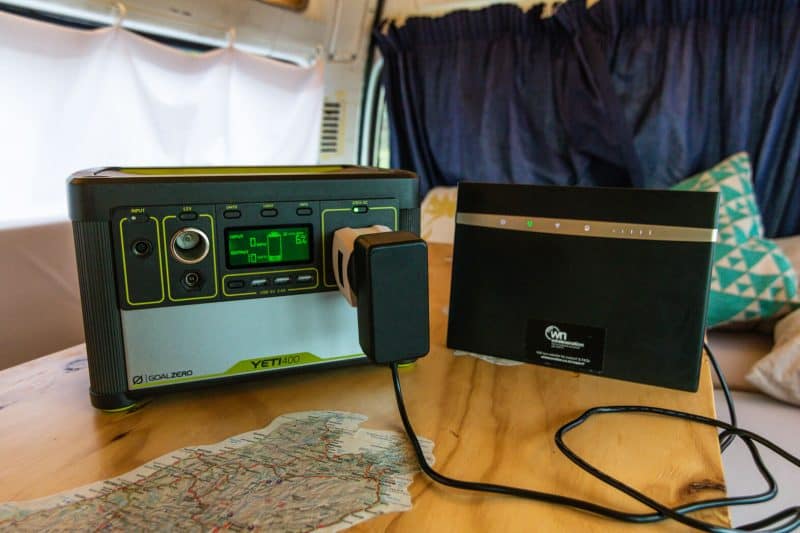
It wasn’t cheap! This set up set us back an additional $1500, but there was no choice, we have to keep a charge on our laptops and camera equipment.
Total campervan digital nomad cost: $1500
*Doesn’t include our internet bill through Wireless Nation!
Maintenance of Your Campervan
I’m going to talk and add these numbers up separately because the issues and maintenance vary greatly across vehicles. You can take what you will from this section…
Here are some the “extras” we had to get for the campervan:
- General maintenance – $312
This includes a lot of stuff we had to get for our WOF, little things that happened along our way like some tape for our taillight, a few bulbs, etc. - WOF inspection – $34
- Rego (registration) – $34
- New tire – $133
- Oil change- $100
What is WOF?
Warrant of Fitness
You’ll likely need to get one/update the one you have during your time campervanning in New Zealand. Depending on your vehicle, your WOF needs to be updated either every 6 or 12 months (unless you buy a brand new car which is unlikely).
You can read more info here but in short, it’s a certification that makes sure your vehicle is roadworthy and you MUST have one. The inspection is very inexpensive BUT depending if you pass or not, the fixes can get very pricey.
When we got our WOF done, we were told we had to fix a taillight, get new bulbs, a new tire, and new brake pads. Luckily, the costs were very reasonable but it’s something you have to budget for. Hopefully, you don’t have any surprises!
Campervan Insurance in New Zealand
Insurance is not mandatory in New Zealand!
It’s crazy. As an American, this is bizarre but also, not even something we entertained. Hell no we are not driving around with ZERO insurance. Maybe if we bought a $2000 beater car, but not with our $10,000 van.
The best insurance we found was AA.
We had to call AA instead of signing up online because their online form only let us type in $5,000 NZD. So if you’re trying to sign up and running into this problem, call them to get more than $5k NZD covered if you paid more than that for your car.
No matter what though, I’d call because not only will you get to choose a higher maximum for your vehicle but they will give you a more customized policy. It turned out to be cheaper and covered more after we spoke with a real human on the phone as the online form was limiting.
The cost and coverage we got:
$87 for five months of comprehensive coverage.
Fire damage, theft, liability insurance, windscreen replacement – Up to $10k NZD.
PLUS: towing, breakdown assistance, six call-outs/year, free AA safety check, random coupons for oil changes, etc.
1000000% worth it for $87!
Luckily, we didn’t need to use our AA coverage except for one time… Garrett didn’t turn the lights off, and we needed a jump. They got to us in an hour and got us sorted.
We also got discounts on an oil change and WOF inspection through them.
Getting a Self-Contained Campervan in New Zealand
This is essential IF you want to have the ability to camp more freely around the country. This, in the end, can you save you a lot of time, money, and headaches, and it’s something I’d recommend doing as I loved having the option of being able to stay at any campsite.
What Does It Mean to Have a Self-Contained Campervan?
Campervanning New Zealand in a self-contained camper means you have a toilet and grey water disposal onboard. To be more specific, you know how large campervans/RVs have full on bathrooms in their vehicle? But the car is a LOT more expensive, so it’s not an option for many people?
Well, here, you have the choice to purchase a portable toilet, which is like a box, for you to do your business in. This can be placed virtually anywhere in your van, just as long as you have access to it, you’re golden.
For the greywater, you’ll need a container made for gathering this water. This means, when you brush your teeth, wash your hand, or do your dishes in the sink that’s in your camper van, the water drops to a container that you’ll need to dump when it gets full. The container prevents the greywater from simply plopping out of your van in into Mother Nature.
To have water from your sink, you’ll also need a freshwater container.
You can hire someone to install and build these things for you (especially the sink, the toilet is an easy purchase) or you can do it yourself. Read more here.
After you’ve completed all these steps, you’ll need to register this vehicle as a self-contained vehicle to obtain a sticker to display in your dash. Having this sticker means you’re certified as a self-contained, and that means FREEDOM!
Many campsites, particularly the free ones, require that vehicles are self-contained as sometimes the resources here are limited (read: no toilet or sink areas). So for you to use the toilet and wash up, you’ll need to be self-contained.
Now, if you park in a place that has a toilet, of course, you can use those! And I suggest you do, because let’s talk about dumping while were’ at it…
How to Dump Your Toilets and Grey Water
Dumping is gross and annoying. The more you fill up your greywater and toilets, the more often you’ll need to dump.
And dumping is allowed in specific official dump stations only, which you can easily find on Campermate (more info on this app below). And if you think there’s some fancy way to dump that’s not gross, think again.
If you have a fancy campervan, there’s a much better system but I’m guessing if you’re reading this post, you’re going have something similar to what we had and unfortunately, there’s no non-nasty way to dump this shit. Literally.
So while having a self-contained vehicle opens up A LOT of choices in terms of parking, it doesn’t mean you HAVE TO USE IT. You can not use your sink, and use the sink station at a campsite. You can use the toilets there too and forgo having to use your portable toilet… Anything to lessen the need for using those things is fine.
And in case it’s not 100% clear: Don’t shit everywhere and wash dishes with harmful soap in nature. Cool? 🙂 That’s really the main point here. Use your self-contained vehicle to do so or proper facilities.
Tips for Campervanning New Zealand
Everything from passes to driving tips, to vehicle safety here… Here are all the tips I could think of to help you campervan New Zealand better!
Passes and Cards for Campervanning New Zealand
We bought the NZMCA pass for $150 – this gave us a discount on the DOC pass (we only paid $67) and on the internet router ($200 startup and $67 per month of usage on their “medium” plan)
PS – I won’t go into detail here but just in case you’re a digital nomad reading this/someone who needs internet A LOT, look up Wireless Nation for an internet router. It’s made for campervanners in New Zealand and it works well! But it ain’t cheap.
We only got the NZMCA card for the discounts, AND so we could get a “full” DOC pass.
There are DOC passes that are for rental vehicles (they only allow you to go to specific DOC sites for a discount) in which you don’t need to NZMCA card to get.

But if you are an NZMCA member and buy the DOC pass through them, you get to stay at all DOC sites for free. FREE. (Only a few DOC sites are not included, usually the more “fancy” sites with lots of amenities)
We saved SO much money with our DOC pass; it paid for itself within the few first weeks. If you can get one, get it.
**Please note, NZMCA limited or didn’t allow overseas applicants to apply at one time or another (so we were told). When we were in NZ, applications were open to foreign applicants and still are at the time of writing. Read the updated info before buying the membership!
Do you need these passes to campervan New Zealand?
No.
But they helped us immensely. Check out the DOC sites, locations etc and see if it would be worth it for you to get it.
Apps to Use When Driving New Zealand
Download and use Campermate. This isn’t a recommendation; it’s a demand! It’s an essential app to see where you can park for the night, fill up drinking water, dump stations, find showers, and more.
There are other apps such as Wikicamps, but instead of being confusing and using different apps for the same thing, I decided to keep it simple and use one app. Campermate is free and is easier to use.
Maps.Me is also another app you must have. Not only is it an offline map so you don’t get lost when you can’t access Google Maps, but it’s a great map to have when hiking too. They have tons of trails mapped out on their app; it’s excellent for keeping peace of mind when hitting the trails.
Gaspy was also helpful. You open the app, and it shows you the cheapest gas within your proximity. This saved us a few bucks!
Driving Tips for New Zealand
- The speed limit – Can be a bit crazy! It’s 100km on open road and 50km in residential areas and towns. This seems fine on the surface but sometimes 100km an hour is just too fast for some areas, be chill, and this is a rule that is luckily flexible, go slower if you need to.
- The road is different here – Like, a highway is what a backcountry road would look like back in the US. Keep this in mind. Pretty much every road except for a few big cities, and mostly on North Island, are just two-lane roads. Take care passing, remember that you should be on the LEFT side, let others pass you, and those “give way” signs that you’ll see everywhere should be more like a stop sign!
- Stay on the LEFT-hand side of the road – Just had to say it once more. I always told myself “stay in the middle” because as a driver, you’ll always be in the “middle” of the road and not on the curbside – no matter what side of the road you are supposed to drive on.
- Google Maps doesn’t always give the right time – Depending on where you’re going, add on some time to the Google Maps prediction. Sometimes the smaller roads, sheep traffic, gravel roads, or other delays will likely make your trip longer than it predicts.
Vehicle Safety in New Zealand
New Zealand is pretty damn safe and peaceful, but it doesn’t mean there aren’t any trouble makers lurking about. Here are a few things you can do to take extra precaution when campervanning New Zealand.
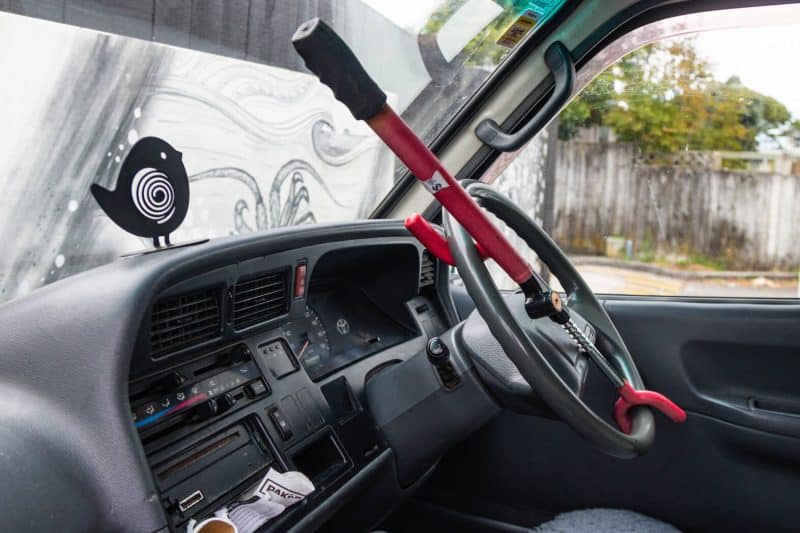
- Get a wheel lock. We got ours for $7 at a second-hand store. Too easy. It’s a deterrent; thieves want easy vehicles. Make it harder for them.
- Freedom camping is sometimes a bit of a risk as you’re an easy target for troublemaking locals to mess with. Some locals hate freedom campers, and they can cause a ruckus. This is why we were happy to use our DOC pass as often as possible, we still got to camp for free, and nobody messes with you.
- We closed all the curtains every time we parked. Yes, it was a bit annoying to close them then open them back up before driving away, but we did it, and I think it’s an excellent tip. Closing curtains means nobody can see inside, meaning that thieves are going to be deterred because they can’t see a goal or reward… What’s in this van? Is it a dirty hippies van with some old ramen and a musty towel to steal or is it a van filled with over $25,000 of camera equipment, a solar panel, YETI battery, computers, and hard drives? Yeah… we were the latter and DID NOT want anyone else knowing that. Curtains SHUT.
- And just in case someone peeked through, we put all our expensive stuff away, hidden, and sometimes randomly placed in spaces. We also threw a few clothes around to make it look like a dirty hippy van.
- We also took a lock from a hardware store and secured a latch to one of our storage seats. The seat opened and had storage in it, we latched this with a padlock, so if anyone did break-in, they would need to make a huge mess and a lot of noise to break through the wood and break the latch off. Again – make it hard for a thief!
- We always parked, if we could, in the “busier area” of the parking lot. AKA where lots of people pass or congregate, or right in front of the storefront, etc. We never parked in the far back of a lot. We liked doing this because again, we had so many “barriers” for the thief, they would draw so much attention to the car if they even tried getting in to steal anything.
- Keep an eye out at popular places and read on Campermate if anyone has had issues lately. A few attractions (only on the north island for some reason) has tons of reports for vehicles being messed with and window glass on the floor! If this is the case, take extra care parking your car a take the tips above as a guideline.
Overall, everything was OK, and we were fortunate not to have any issues. The closest problem we had was I went off to snap a quick picture of something while Garrett stayed in the back of the van changing. A random car pulled up thinking nobody was in the van, started looking around, and Garrett made it known he was in the van. They ran off.
We took some psycho precautions as you can see, we have a LOT of equipment and a lot to lose. We were semi-paranoid, I’ll admit, but it seemed to serve us well and took like 2 minutes extra to prep the car for sitting in a parking spot. Worth it for our peace of mind.
How Much Did We Sell Our Campervan For?
$7700
We “lost” $2000 on the sale.
We included the YETI and solar panel too.
Reasons we sold it for less: The main reason was we were selling in winter. If we were to sell in summer, we probably would have got what we paid for it or more considering the upgrades and it looking SO much nicer than when we first got it.
We aren’t mad though, I mean, let’s do the math here…
If all we did was spend $2000 after all was said and done and used the car for 4.5 months that means we only spent $444 a month for accommodation and a mode of transportation during our time in New Zeland. That’s only $222 per person which is just INSANE.
(Note that doesn’t include gas, campervan sites, etc… that’s just the base price when simply speaking about JUST the van as a home and transport)
How to Sell Your Campervan in New Zealand
Cash.
Done. Full stop. Period.
Anyone trying to pay you via Paypal or in any other method really can be potentially scamming you. Any transaction where they can do a reverse charge or dispute or something has the possibility of happening.
With that said, it’s not that a bank transfer isn’t an option and is a total scam, BUT you need to be damn careful.
When we sold our van, we allowed the buyer to transfer partial payments and then provide the remainder in cash. This protected everyone. He sent some via transfer, we waited for it to clear, and when the rest was transferred/handed in cash, we immediately transferred the funds to another account that same day and then handed the keys over when he gave us the rest of the cash.
Use your gut, Garrett (who handled the sale) felt this dude was legit. After all, he sent us $800 as a deposit before even seeing the car in person (he only saw our Facebook ad.) So this instilled some confidence in us.
If you can, sell and accept cash only.
If someone “isn’t in town,” wants to transfer money and have you leave the keys somewhere to sell your car—DON’T do this. Apparently, this is a common scam people are naive enough to fall for. If it sounds sketchy, it usually is.
You can easily sell just as you bought, via Facebook, this is what we did. If you have troubles selling before your flight, there are dealerships that will take your vehicle off your hands but they won’t give you much.
For some reason, the people with the smaller vehicles, that aren’t self-contained, that are cheap (like $2-3k NZD), and that were a bit haphazardly put together were the ones that always seemed to have the most trouble selling. Likely because they were so cheap, so easy to come by and were kinda crappy.
If this is the vehicle you plan to buy, I’d go into it with the thought of not getting anything back for it. Sure you CAN sell it, but just in case you can’t, I’d mentally tell myself to say goodbye to my $2k (which isn’t that much if you get a few months of use out of it).
Costs for Our Campervan in New Zealand
For everything car related, this is what we paid:
$9700 – For the van, solar, battery, upgrades, renovation…
$613 – Maintenance, WOF, tire, etc…
$935 – Gas (this was for about 8,000km or so over the course of 4.5 months)
$450 – Diesel tax (ouch! but necessary. This was for 10,000km)
$87 – insurance
TOTAL: $11,785 ⇒ After selling for $7,700 ⇒ $4085
I absolutely LOVED our van, and I honestly and truly miss Birdie every day. Campervanning New Zealand is hands down one of the best things I’ve done in all my years of traveling. It’s the greatest way to explore the country as well so I hope you have an EPIC time exploring.
Don’t leave yet though because I have a million other posts for you to read to help plan your trip to New Zealand!
More New Zealand Travel Tips

Are you campervanning New Zealand? Let us know in the comments!
>>> EVEN MORE ABOUT TRAVELING NEW ZEALAND <<<
A 5-Day Queenstown Itinerary For the Intrepid (New Zealand)
2-Week North Island, New Zealand Road Trip Itinerary
20+ Day New Zealand South Island Road Trip Itinerary
50+ of the Best Hikes in New Zealand & Hiking Tips
Piha & Waitakere Ranges Walks, Waterfalls, and Beaches—New Zealand
A Guide to The Pouakai Circuit & Hut at Mount Taranaki (New Zealand)
11 Fab Things to Do in The Coromandel, New Zealand
Epic Things to Do in Rotorua—Hot Pools & Adventures
7 Tips For The Cathedral Cove Walk in The Coromandel, New Zealand
A Guide to Hiking The Kepler Track in Fiordland National Park, New Zealand
5 Epic Hikes in Mount Cook National Park That Are TOTALLY Worth It (New Zealand)
A Guide to Hiking French Ridge Hut in Aspiring National Park (New Zealand)
A Guide to Hiking the Mueller Hut Track & What to Pack (New Zealand)
Hooker Valley Track: The Easiest & Most Beautiful Hike in Mount Cook NP (New Zealand)
Guide to the Routeburn Track: Should You Do It as a Day Hike? (New Zealand)
5 Things to Know about Milford Sound, How to See It and Is It Worth It? (New Zealand)
Hiking Roy’s Peak & How to NOT to Wait in Line For A Pic (New Zealand)
An Adventurer’s Guide to Exploring Lake Tekapo, New Zealand
4 Easy But Beautiful Walks Around Dunedin, New Zealand
11 Things to Do in The Catlins in 2 Days (New Zealand)
A Guide to Exploring The Cave Stream Scenic Reserve (New Zealand)
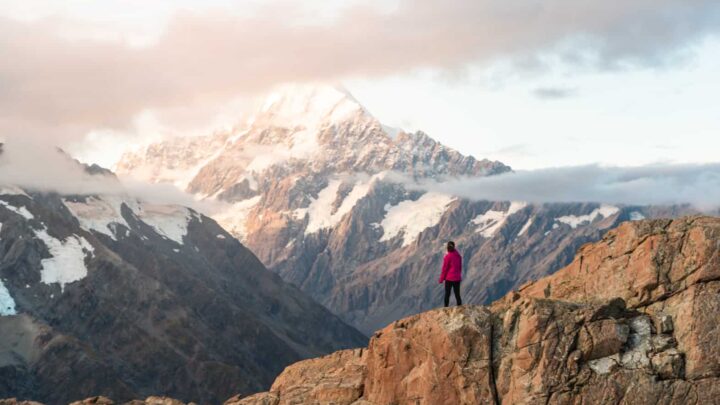
Don’t lose this post! Click the picture and pin it to Pinterest!