
A Guide to Hiking The Kepler Track in Fiordland National Park, New Zealand
The following article on hiking the Kepler Track is a guest post by Daniel.
The Kepler Track is one of New Zealand’s most popular hikes.
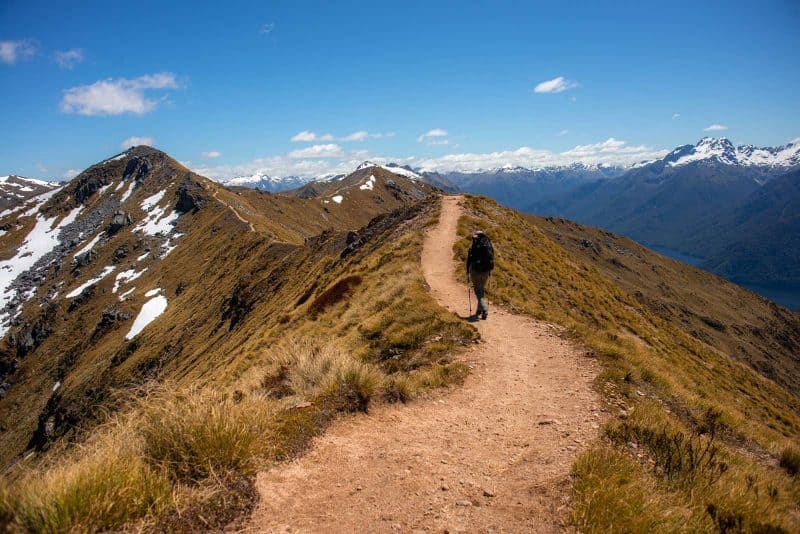
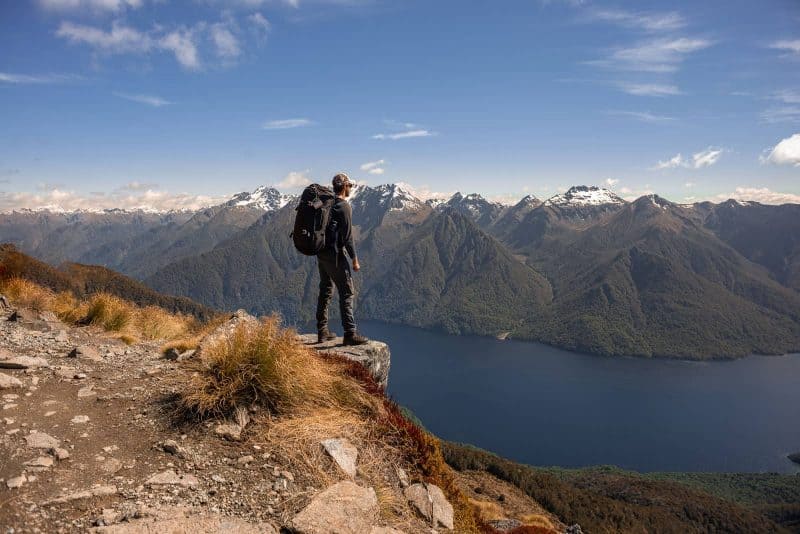
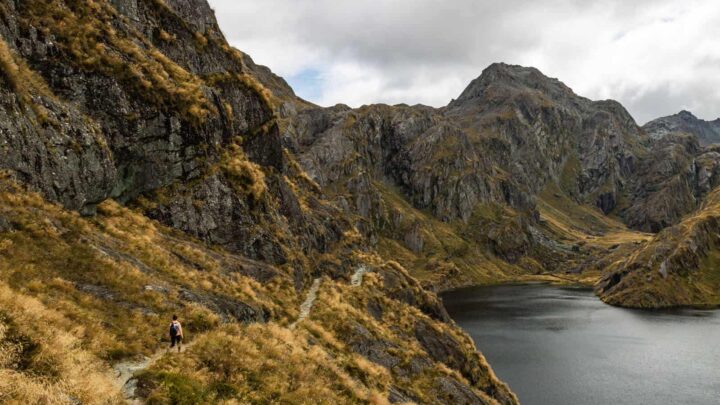
The 1 to 4-day trail takes hikers through the stunning landscapes of Fiordland National Park, one of the best places to visit in New Zealand’s south island, while weaving through lush bushland, traversing the ridge line of Luxmore Mountain, and peacefully walking along the beautiful lake edge of Lake Te Anau.
Although the Kepler Track is one of New Zealand’s most popular hikes, it’s can still be very hard to plan. Why you ask? Because there are so many different ways to hike the trail!
From hiking in either direction to staying at different huts, it can all get confusing and expensive very quickly.
Luckily, I spent far too much time researching the trail and after finally completing it I can help you not make the same mistakes I did!
Here’s everything you need to know about the Kepler Track.
Table of Contents
A Guide to Hiking The Kepler Track
The Kepler Track is a 60km trail that starts just outside the town of Te Anau in New Zealand’s South Island.
Te Anau is a 3-hour drive from Queenstown which is New Zealand’s most popular tourist destination. With the sheer amount of things to do in Queenstown, you’re guaranteed to spend some time here on your trip.
The trail is hiked in either a clockwise or anti-clockwise direction and starts and finishes in the same location. Along the trail, there are three huts and two campsites which are used as accommodation.
These huts and campsites must be booked in advance for the months between October 28 and May 1.
The classic way to hike the trail is over 3 nights and 4 days in an anti-clockwise direction staying in three different huts. However, the trail is also open to day hikers too. Aside from the classic way to hike the trail, you can pick any combination of campsites and huts in either direction.
Huts and Campsites Along The Kepler Track
As mentioned, there are many huts along the way and staying at all of them isn’t necessary. Here are all the huts in anti-clockwise order from the carpark.
Brod Bay Campsite
The Brod Bay campsite is the first campsite from the starting point of the trail. It is located 5.6km from the start and 8.2kms from the Luxmore Hut. It features 30 campsites, a rainwater tank, and pit toilets.
From the carpark expect to walk for around 1.5 hours on a flat well-maintained path. From the Luxmore Hut, expect a gradual descent along switchbacks through the lower forest areas for around 2.5 hours.
This campsite is in a beautiful location on the edge of Lake Te Anau. To be honest, very few people actually stay here as it’s so close to the start and finish of the trail.
You can also start your hike from Brod Bay by catching one of the water taxis across the Lake from Te Anau. This will cut 6km off your trip and this can be applied to any of the itineraries mentioned below!
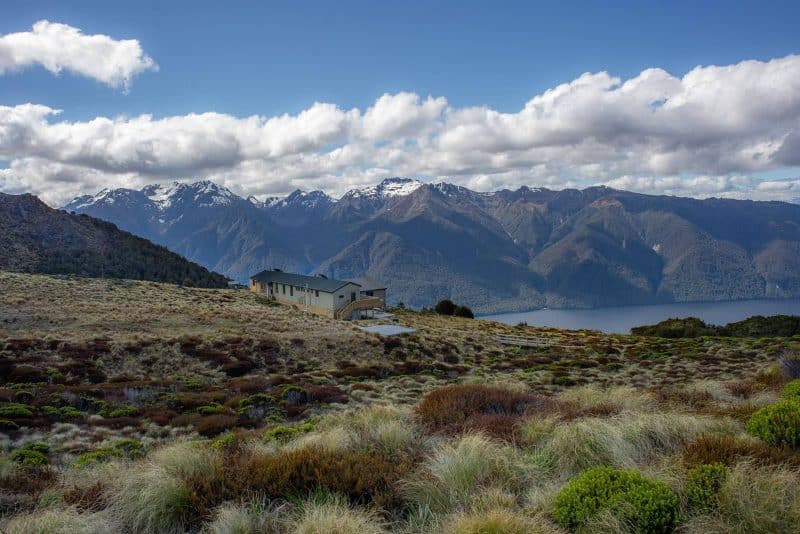
Luxmore Hut
The Luxmore Hut is both the most popular hut on the trail and the most beautiful. It is the first place to stay on the classic route. As mentioned above, it is 8.2km from Broad Bay and 14.6km from the Iris Burn Hut.
The Luxmore Hut features 54 bunks with mats, an inside cooking area with gas stoves, flush toilets, and indoor and outdoor seating. This hut has a permanent hut ranger during the summer hiking season.
From the start of the trail expect a 5 to 6-hour hike to reach the Luxmore Hut.
From Broad Bay, the trail climbs over 700m in elevation making it a tough climb. Your hardest day is from the Luxmore Hut to Iris Burn Hut and on this day you can expect a 6+ hour hike depending on the weather.
The Luxmore Hut is located on the saddle of Mount Luxmore and offers stunning views of Lake Te Anau and the Southern Alps. This hut is almost always full in summer which is why you must book in advance!
Iris Burn Hut and Campsite
The Iris Burn Hut is the second most popular hut on the trail. This is the second place to stay on the classic route. It is 14.6km from the Luxmore hut and 16.2km from Moturau Hut.
The Iris Burn Hut features 50 bunks and 30 campsites. For people staying in the hut, you have gas stoves, flush toilets, bunks with mats and an indoor and outdoor seating area.
For campers, there is a cooking shelter and pit toilets. The Iris Burn Hut and campsite have a permanent ranger during the summer hiking season.
Hiking between the Iris Burn Hut and Luxmore Hut is the hardest day on the trail. Hiking this section from the Luxmore Hut towards Iris Burn is actually easier than hiking to the Luxmore Hut from Iris Burn.
This is due to the climb in elevation and the fact you will need to walk the ridgeline in the hotter parts of the day. Expect an extra hour or two if you hike this section of the trail in a clockwise direction.
To the Moturau Hut is only a 5-hour walk from Iris Burn. This part of the trail has an elevation climb of 250m, Moturau being the lower Hut.
The Iris Burn Hut is in a beautiful forest area along the river. Nearby there is a rather nice waterfall. This hut is prone to sandflies so please be prepared!
RELATED: A Guide to Hiking French Ridge Hut in Aspiring National Park
Moturau Hut
The Moturau Hut is the last place to stay on the classic route. This hut is 15.5km from the end of the trail.
The Hut features 40 bunks. The facilities available at the hut are gas stoves, flush toilets, bunks with mats, and an indoor and outdoor seating area. This hut has a permanent hut ranger during the summer hiking season.
The Moturau hut is a 5-hour hike from the finish and Iris Burn, this section of the trail is mostly flat.
This hut sits on the lake’s edge of Lake Manapouri. It’s a very beautiful location however it is also prone to sandflies!
Rainbow Reach Carpark
The Rainbow Reach Carpark is 9.5km from the end of the trail and only 6km from Moturau Hut. There is no accommodation here however people use this carpark to finish the hike early.
It is very common for hikers to skip staying at Moturau hut and simply hike out of the park from Iris Burn Hut. At Rainbow Reach, you can get a bus to the Kepler Track carpark or to Te Anau town.
The bus costs $14 per person and arrives at 10 am and 3 pm. You do not need to book the bus but it is recommended.
This saves people the fee for the last nights’ accommodation and makes hiking the trail much cheaper.
Booking The Kepler Track
In recent times, the trail has become very popular. This now means that planning your trip on the Kepler Track has never been more important. Bookings fill up fast for the summer months (you do not have to book in winter), especially in December, January, and February.
Bookings for the trail usually open in June for the next hiking season (October to April) however it is best to check the official DOC bookings website for the official date (it’s known to change and face delays).
Campsites cost $20 for New Zealand residents and $40 for international visitors.
Huts cost $65 for New Zealand residents and $130 for international visitors.
I would recommend booking the Kepler Track as soon as bookings open to secure your spot.
4 Kepler Track Trip Itineraries
1. Classic
Duration: 3 nights 4 days
Cost: $195 (New Zealand resident) $390 (international visitor)
Campsites or Huts: Luxmore Hut, Iris Burn Hut, Moturua Hut.
Direction: Can be done in either direction
This is the most popular route and the one you will find most other hikers doing. It’s a great way to take your time on the trail, enjoy stunning views, and have the time to truly appreciate everything around you.
However, this classic route is very expensive. At $390 per person, it’s safe to say it’s not what you’d usually expect to pay on a hike!
If you want to save some money then consider camping at Iris Burn Hut instead of staying in the hut. This will save you $90 to $45 on your trip – just remember to bring your tent and other supplies!
2. Classic to Rainbow Reach (Our Top Pick)
Duration: 2 nights 3 days
Cost: $130 (NZ resident) $260 (international visitor) + $14 for the bus back to main carpark or Te Anau.
Campsites or Huts: Luxmore hut, Iris Burn Hut
Direction: Can be done in either direction but I recommend anti-clockwise
This is my top pick when it comes to the perfect itinerary. The days on this hike are all the same as the classic except the last (or first depending on your direction.) This route cuts out the Moturua Hut and the 6km between the Rainbow Reach Carpark and the end/beginning of the trail. Instead, you take the bus from Rainbow Reach to the trail finishing point (the Kepler Track carpark.)
This saves you one-night accommodation at the hut and instead you only need to pay $14 for the bus back to your car or Te Anau.
On this route, you can also save another $90 or $45 by camping at Iris Burn as mentioned above.
3. The Mad Hiker
Duration: 1 night two days
Cost: $65 (NZ resident) $130 (international visitor) + bus at Rainbow Reach
Campsites or Huts: Iris Burn
Direction: Can be done in either direction
I really don’t recommend this however it’s amazing how many people you see doing it! It involves 2 massive days of hiking. 28.4kms from the carpark to Iris Burn via Luxmore Hut and then 22.2km to Rainbow Reach carpark.
If you decide to camp at Iris Burn then this trip could cost as little as $54 with the bus for visitors, and $34 for locals.
I highly recommend taking the water taxi to Broad Bay on the first or last day (depending on the direction you hike). This will cut an extra 6km off your hike!
The major issue I have with this route (aside from the distances) is not spending a night at the Luxmore Hut. Staying here was one of the highlights of the Kepler Track.
4. The Day Hiker
Duration: 1 day
Cost: Free
Campsites: None
Direction: Anti clockwise (start to Luxmore Hut)
It’s very popular to just day hike from the carpark to Luxmore Hut with a light day pack. You can still get stunning views from the Luxmore Hut without spending hundreds of dollars.
This hike will take around 8 hours for a fit person. I would recommend doing this if you have hiking experience or are relatively fit. One reason for this is that if you don’t make it to the hut or at the very least the tree line you won’t get the amazing views.
If you want to cut some time off the trail, then get the boat from Te Anau to Broad Bay. This wipes off 6km and makes the hike 12km shorter. Be sure to organize with the boat drivers beforehand of the time you will arrive.
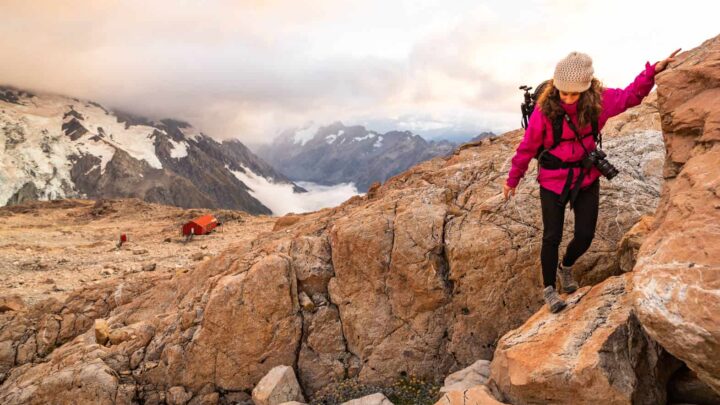
RELATED: Hiking and Staying in Mueller Hut at Mount Cook National Park
Know Before You Go
- Water – The water in the park is fine to drink, however, you can boil it or treat the water if you want to. The rangers can tell you where you can fill your bottle at the Hut talks (7:30 pm every night). Please note that most of the water has a yellow/green color to it. This is from the tannins (the same stuff that gives tea its color) in the leaves and the water is still fine to drink!
- Toilet paper – The huts have toilet paper (Brod Bay doesn’t)
- Carpark – The carpark at the Kepler Track starting point is free. Break-ins are very rare at the Kepler Track carpark, however, it is recommended not to leave valuables in the car.
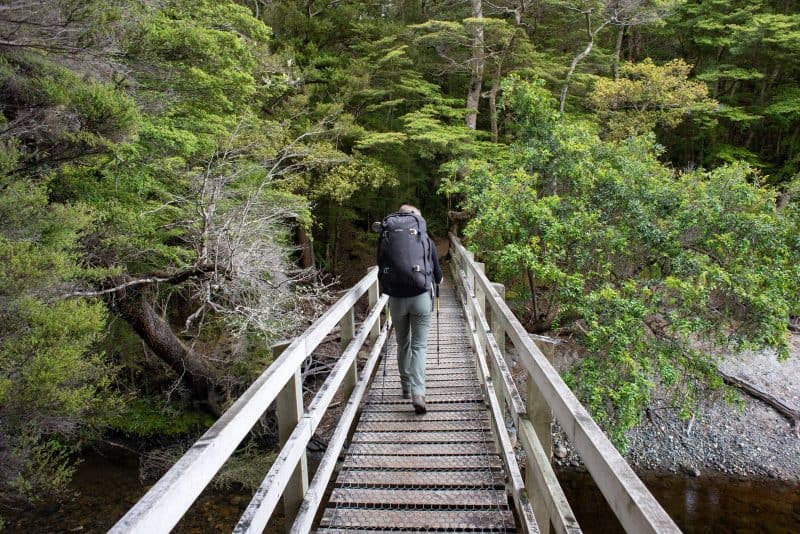
- Track maintenance – The trail is very well maintained with bridges to cross streams and rivers (in summer). In the winter these bridges are removed.
- Winter Hiking – People die hiking the Kepler Track in winter. Please do not hike the trail in winter without the right experience, knowledge, and equipment. Be sure to check with the Department of Conservation on trail conditions and weather before heading out.
- Temperatures – In the summer it gets really hot during the day, however, overnight temperatures are still very cold. Bring at least one warm jacket or jumper.
- Checking in and out with the DOC – YOU MUST check in with the DOC office in Te Anau before starting the trail. They will provide you with weather reports, track conditions and if you’re staying in the huts, your hut tickets. You need to carry these with you. Upon returning it is a good idea to check back in with the DOC and sign yourself out of the track.
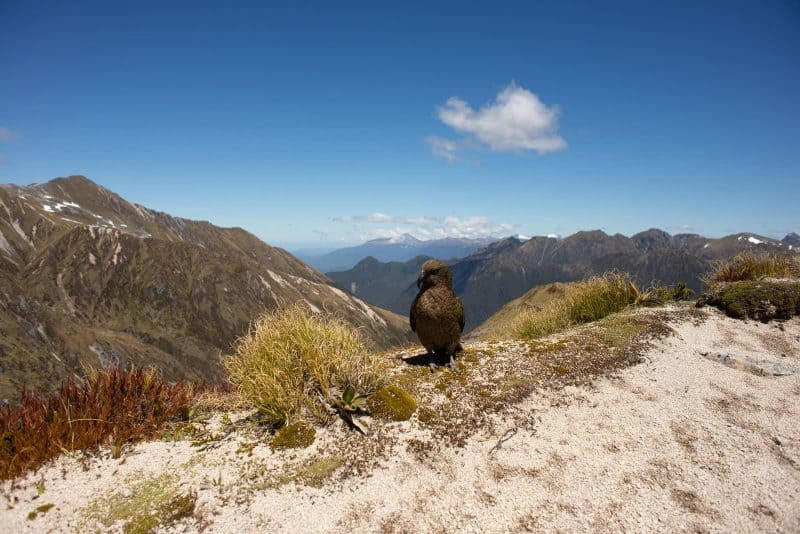
- Wildlife – On the trail, it is very common to see Keas—New Zealand’s alpine parrot. They are extremely friendly but very mischievous. Please don’t leave your bags unattended or they will tear them open looking for food. These birds are smart and will fly above you waiting for an opportunity. Please do not feed them either. Another bird species you can see at the Moturau Hut are Kiwis. They are much rarer than Keas and they are also nocturnal – so you will have to head out after dark. But they do call this area home, so fingers crossed you run into one.
- Equipment Hire – Let’s face it, the last thing you want to do is carry all your camping gear to New Zealand. For that reason, you can easily hire gear in Te Anau if you don’t already have everything you’ll need.
- Emergency – It is recommended that you bring an SOS beacon with you. You can hire these in Te Anau at any rental store. With this, you can get a helicopter to you within 5 to 10 minutes in case of an emergency.
What to Bring
- Tent (campers only) – You must use a tent. Please do not bring hammocks as they damage the trees in Fiordland National Park.
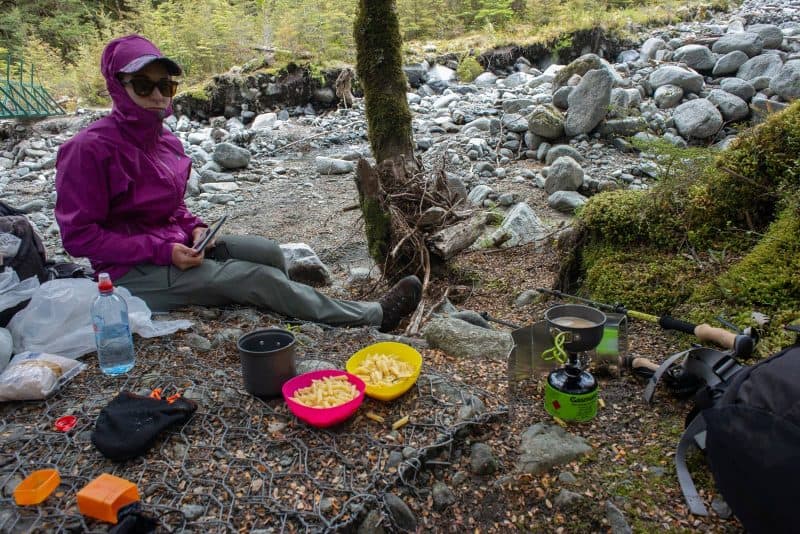
- Cooker (campers only) – Campers are not allowed to use hut facilities so you must bring your own gas cooker.
- Gas (campers only) – As mentioned above.
- Sleeping bag – The huts have mats but no blankets so you will need a sleeping bag.
- Food – Pretty self-explanatory…we all need to eat.
- 1.5L water bottle (minimum) – Some sections of the trail involve long distances without opportunity’s to fill your water bottle. Bring at least 1.5L.
- Water purification (optional) – As I said the water is fine to drink but you can never be too careful!
- Lighter or matches – The huts have self-lighting stoves, however, they don’t all work.
- Bug repellent – Mosquitos are not common on the trail however sandflies are the real problem. They leave a nasty bite that on people who don’t get bitten often can hang around for weeks.
No matter what way you hike the Kepler Track, one thing is for sure, you’re bound to have an amazing time! From the stunning views, unique wildlife, and the accomplishment of hiking the trail it’s one trip you certainly won’t forget.
Now that you have the information you need, all that’s left is to hit the trail!
More New Zealand Hikes

Are you hiking the Kepler Track in New Zealand? Let us know in the comments!
>>> EVEN MORE ABOUT TRAVELING NEW ZEALAND <<<
Work & Travel New Zealand: Get a Working Holiday Visa for New Zealand
A 5-Day Queenstown Itinerary For the Intrepid (New Zealand)
2-Week North Island, New Zealand Road Trip Itinerary
New Zealand Road Trip Itinerary—2 Weeks to 2 Months + Costs and Tips
20+ Day New Zealand South Island Road Trip Itinerary
Campervan Sites in New Zealand + Camping and Food Tips
Campervanning New Zealand: Buying, Selling, Renovating, and Tips
New Zealand Travel Tips + A Budget Breakdown
Piha & Waitakere Ranges Walks, Waterfalls, and Beaches—New Zealand
A Guide to The Pouakai Circuit & Hut at Mount Taranaki (New Zealand)
11 Fab Things to Do in The Coromandel, New Zealand
Epic Things to Do in Rotorua—Hot Pools & Adventures
7 Tips For The Cathedral Cove Walk in The Coromandel, New Zealand
A Guide to Hiking French Ridge Hut in Aspiring National Park (New Zealand)
Hooker Valley Track: The Easiest & Most Beautiful Hike in Mount Cook NP (New Zealand)
5 Things to Know about Milford Sound, How to See It and Is It Worth It? (New Zealand)
An Adventurer’s Guide to Exploring Lake Tekapo, New Zealand
4 Easy But Beautiful Walks Around Dunedin, New Zealand
11 Things to Do in The Catlins in 2 Days (New Zealand)
A Guide to Exploring The Cave Stream Scenic Reserve (New Zealand)
>>> Bio
Daniel is a full-time travel blogger who along with his partner Bailey run the travel blog Destinationless Travel. Daniel found his passion for travel at a young age and after enjoying writing about his experiences decided to make it his profession. Daniel’s writing style is about creating helpful articles filled with information. He hopes his blogs not only inspire but make travel easier for those less experienced!