A Guide to Hiking the Mueller Hut Track & What to Pack (New Zealand)
*me sitting in front of the computer planning my next few days in New Zealand*
Mountain huts in New Zealand, huh? That sounds fun! I’ve never stayed in a backcountry mountain hut before.
Let me see, hmmm… Mueller Hut, Oh! This one sounds cool; I’m going to that area next! It says bookings are made far in advance but holy crap, there’s an opening in the hut in three days!
OMG OMG… Booking it now.
*click, click*
BOOKED!
I guess I should see what I need to hike to this hut, don’t I? Oh, I need a sleeping bag. And maybe trekking poles. And it’s a pretty rough hike. And I don’t have the proper food with me, and I need to go shopping, and I’m not near a store…
F*ck. I’m not at all prepared to hike to Mueller Hut! What was I thinking!?
This was literally me just a few weeks before hiking to Mueller Hut. I got so excited about it; I booked it without knowing anything about it.
Luckily for me, I got my head out of my ass I actually started reading about it (ya know, after I booked it because I’m smart like that) and realized that I was in fact, underprepared and I would be stupid to trek this hike right now.
There was only one bed left, and I spontaneously bought it without doing any further research. So when I finally realized my mistake, I called, rescheduled the hike for a later date, and got my *ish together!
I’m happy to say, I ended up having a successful hike up to Mueller Hut, had a fantastic time, was prepared, and didn’t die. So that’s all great.
Now I’m hoping to relay some of the info back to you to help you along on your stay and hike to Mueller Hut.
Table of Contents
- Hiking and Staying in Mueller Hut, Mount Cook National Park
- Hiking to Sealy Tarns
- Hiking to Mueller Hut
- What Else Is There to See up at Mueller Hut?
- What Is It Like Staying in Mueller Hut?
- Can I Hike to Mueller Hut as Day Hike?
- Packing List for Mueller Hut
- What to Bring to Eat at Mueller Hut
- Details About Hiking and Staying in Mueller Hut
- More New Zealand Hikes
Hiking and Staying in Mueller Hut, Mount Cook National Park
Below is everything you need to know about staying and hiking up to Mueller Hut. I’ll say this once now, and probably a few more times within the post… Be aware this hike is challenging and you DO need to be prepared.
Take note of the packing lists below and understand your body’s limits before tackling this hike.
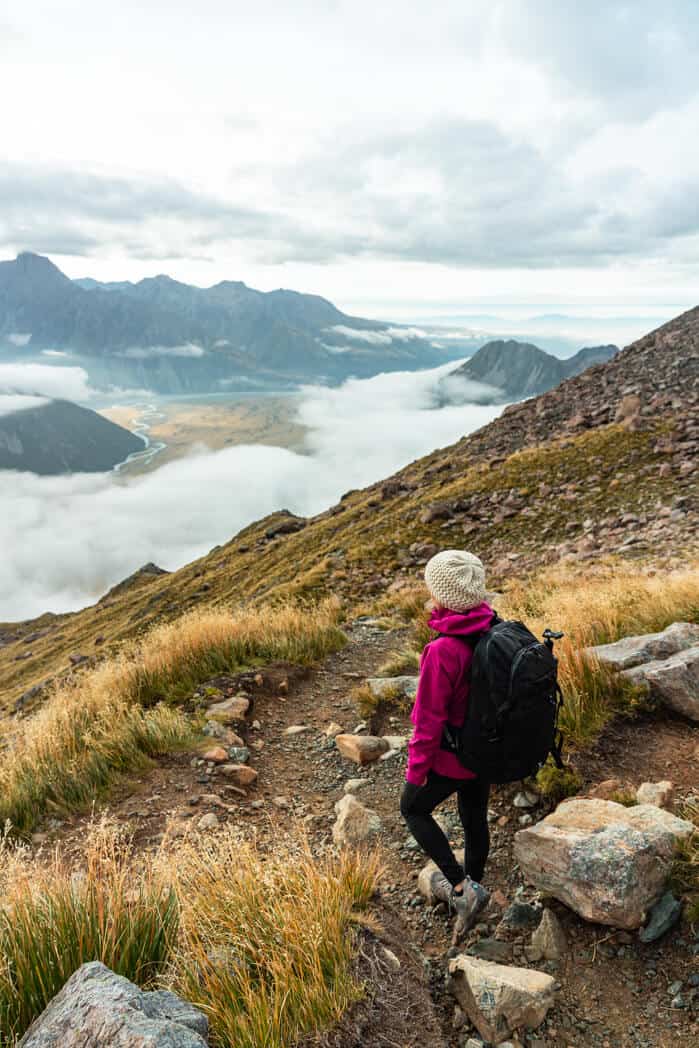
Hiking to Sealy Tarns
Sealy Tarns is the easy bit of the track! This is the trail you’ll be hiking first to continue to the Mueller Hut track.
It’s perfectly easy to follow the steps, all 2,000 something of them, to the viewpoint at the top.
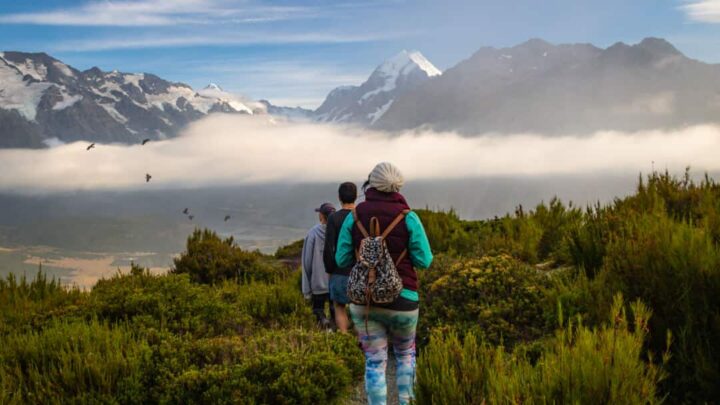
The Sealy Tarns hike ends at a little picnic table overlooking Mount Cook with the massive glacier just to your left and Hooker Valley to your right. The views are pretty damn incredible and are certainly worthy enough to hike up to, but I must say… The second I got there, I told myself I was really happy to be hiking further.
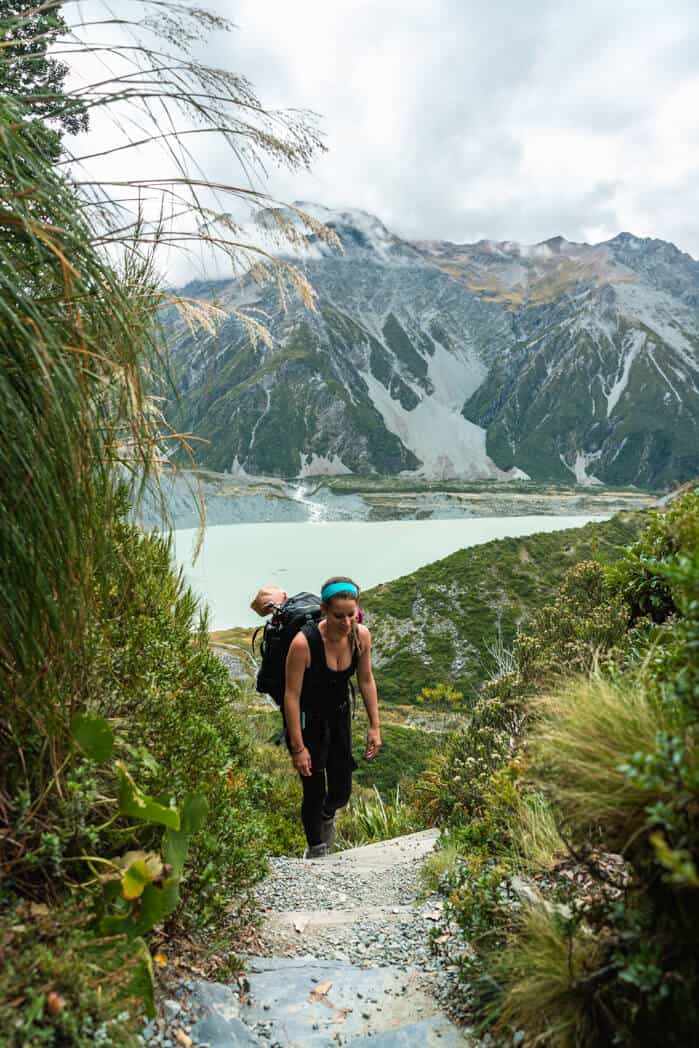
Sealy Tarns feels a bit incomplete as you aren’t really summiting a mountain, it just stops at this viewpoint on the side of the mountain. If you’re low on time, it’s certainly still worth it, though.
NOTE: Don’t continue past the picnic tables to continue the hike. This is NOT the correct path. You must turn back just a bit and look for the Mueller Hut sign pointing up. It will be to the left after you finish the last steps and before you walk to the picnic table (on the right).
People miss this sign, continue hiking, and then need a helicopter rescue because they end up so far off the path, and on the sides of a cliff. Don’t be this person.
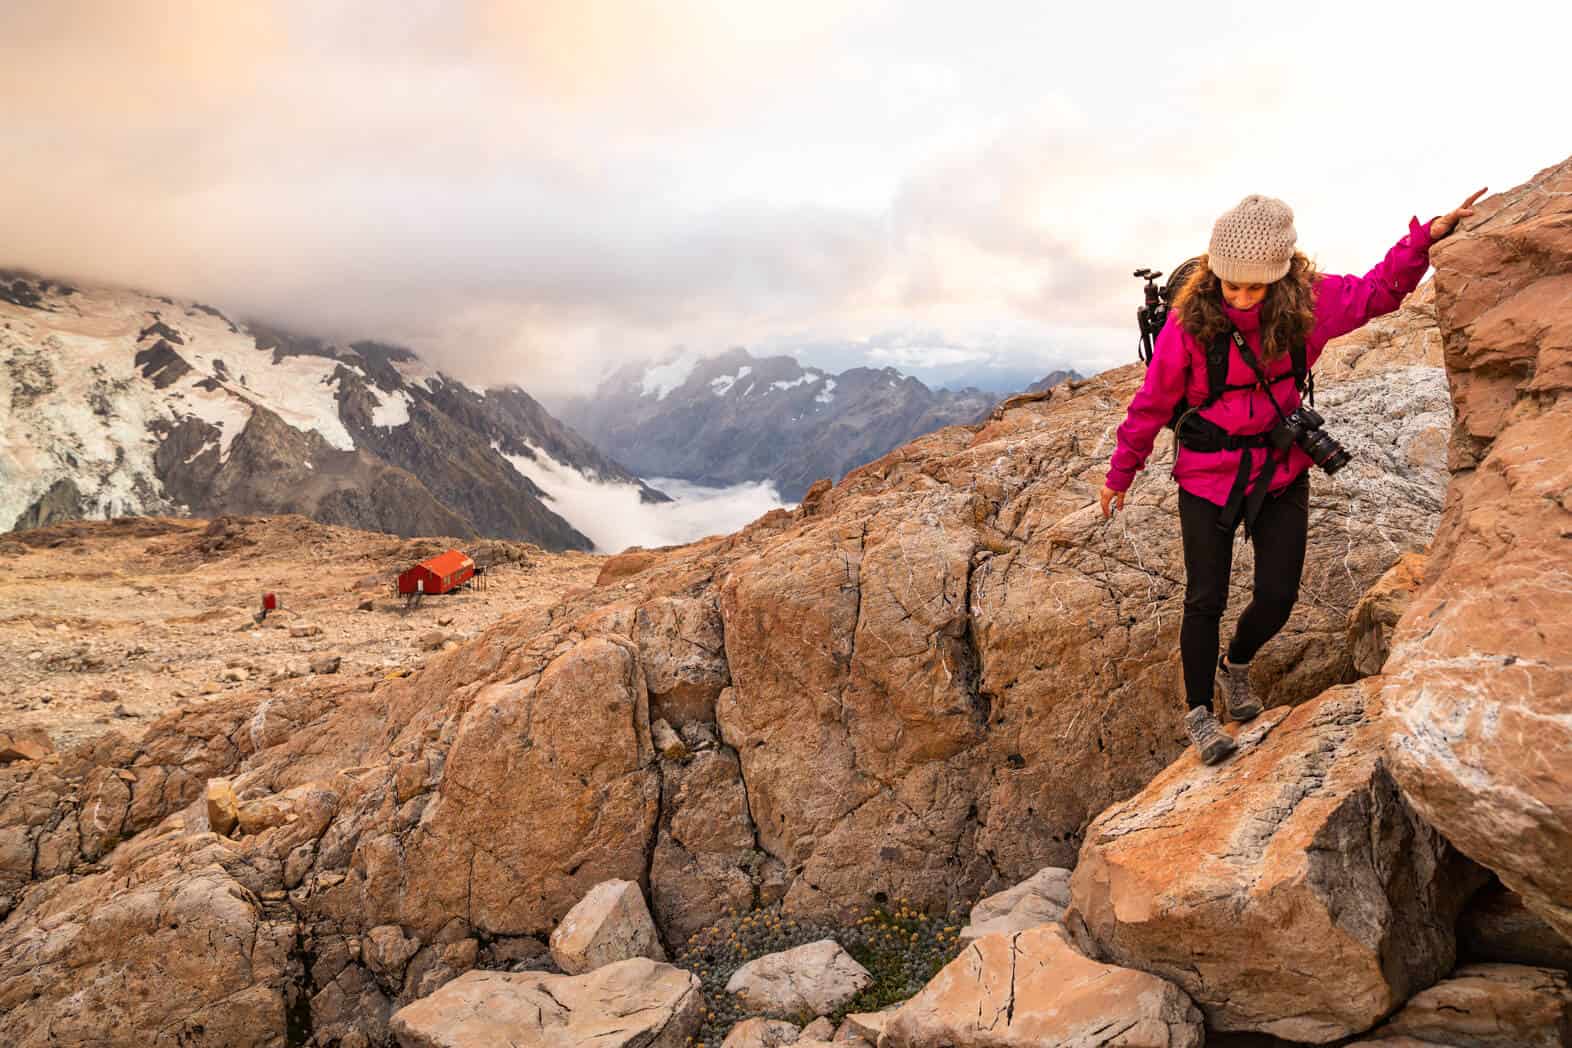
Hiking to Mueller Hut
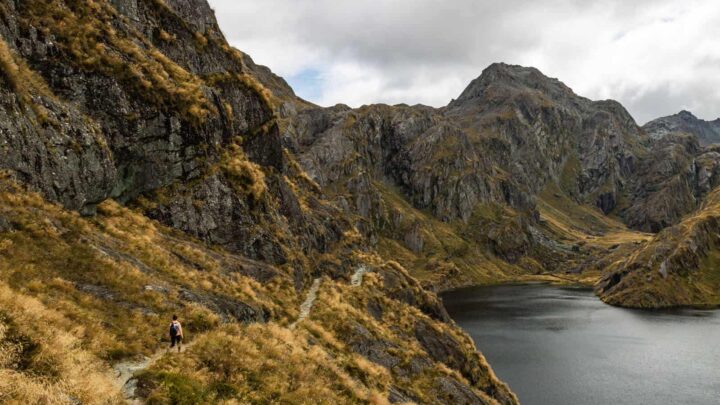
After your legs had a good warm of walking up all those steps, you can say goodbye to them and hello to your new mates, a shit ton of rocks.
You have now entered the more challenging part of the hike and where things can get a bit dangerous, so take your time, pay attention, and choose your steps carefully.
Your ascent up to Mueller Hut will now be guided by a series of seemingly random orange poles. Hike to these poles and these poles ONLY. Don’t stray off the track at any point of time.
This may seem obvious as you read this, but when you’re hiking, it’s easy to miss these orange poles because you’ll be perpetually looking down and watching your step because you’re clambering over large boulders and rocks, some of them being loose.
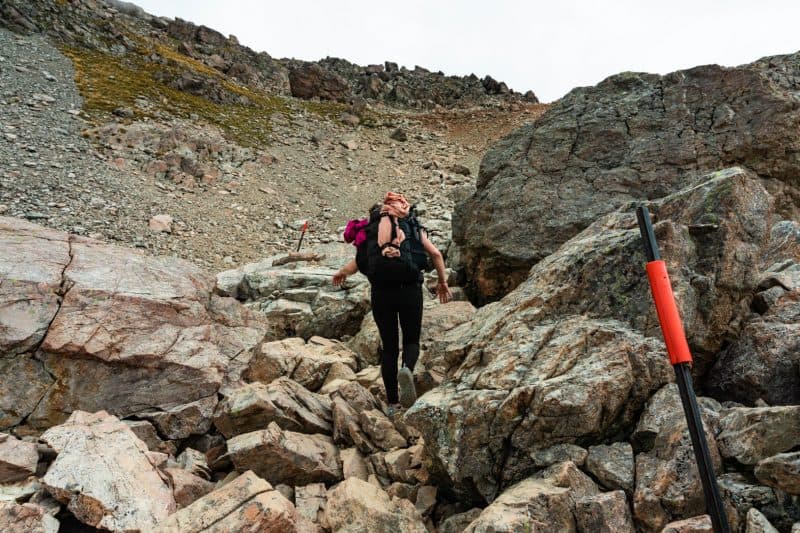
Always remember to look up and keep an eye out for your next orange pole which is the only path to take to Mueller Hut.
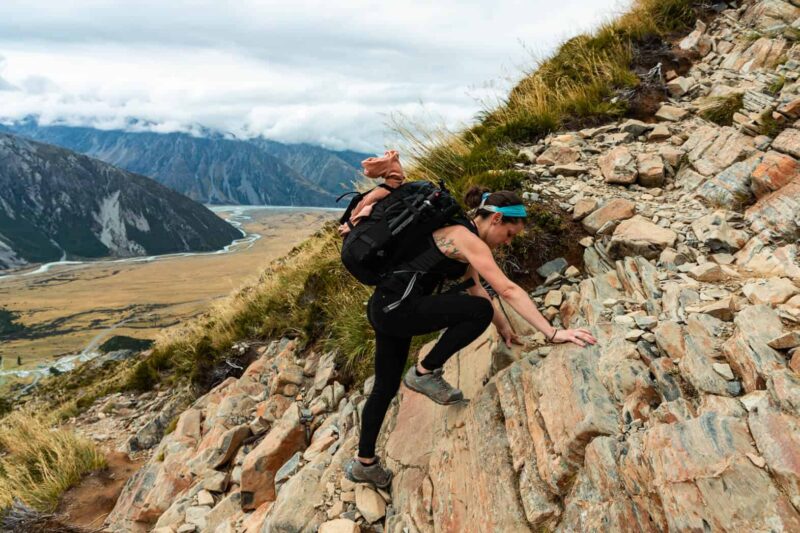
At some points, going up will require a bit of rock climbing, as in, literally climbing a rock to continue.
You won’t be dangling off a cliff’s edge or anything, but you definitely don’t want to fall back. Don’t forget, your backpack is on your back, so there’s extra weight you’re pulling.
The rocky and boulder ridden path is challenging your balance with each step as the rocks can move or your ankle could twist, or your foot could fall into a crack between two rocks, at any given moment.

Speaking of cracks, don’t look down them. Some of them plunge into what must be the core of the earth… It was pretty terrifying to be standing on a rock that is precariously wedged in a crack that drops to who knows where. I tried to avoid those crevices after realizing how far they fell!
Making It to the Viewpoint
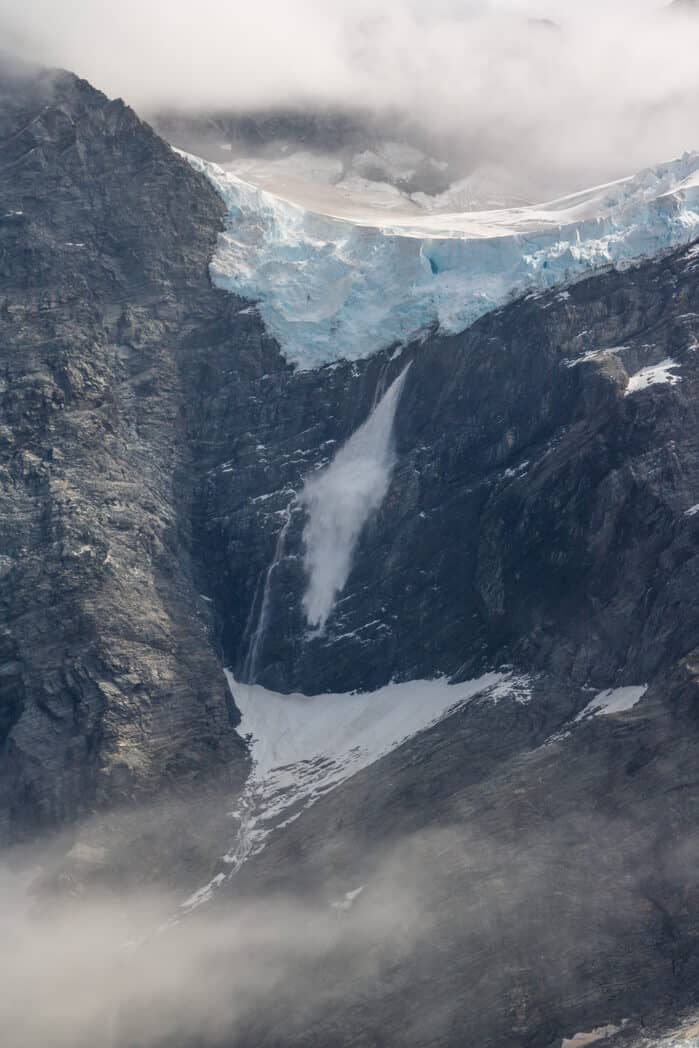
There’s a viewpoint to the right after you make it up to the summit. You can pat yourself on the back; you’re almost there! Take a break here, observe the immense glacier in front of you, stay for more than 10 minutes and an avalanche is almost guaranteed, they happen so often.
The rocky outcrop is perfect for a little rest, a snack, and to finally get a reward for all the hard work you just did on the Mueller Hut hike so far. The last mile and half was pretty treacherous.
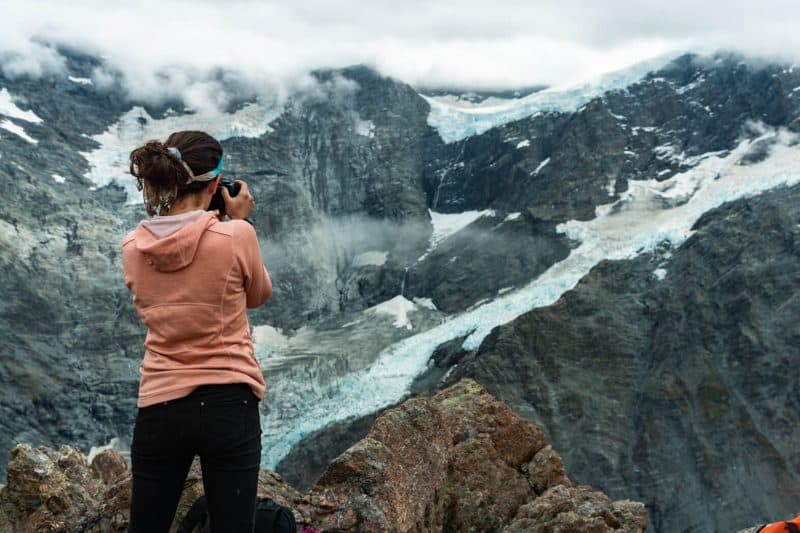
After you’ve had your moment, you’re only about a half a mile away from Mueller Hut, but you can’t see it yet. It hides until the last moment, so you’ll just have to picture it in front of you. Luckily this last bit isn’t too hard, as the incline is gradual and the path is a bit more manageable.
Making it to Mueller Hut
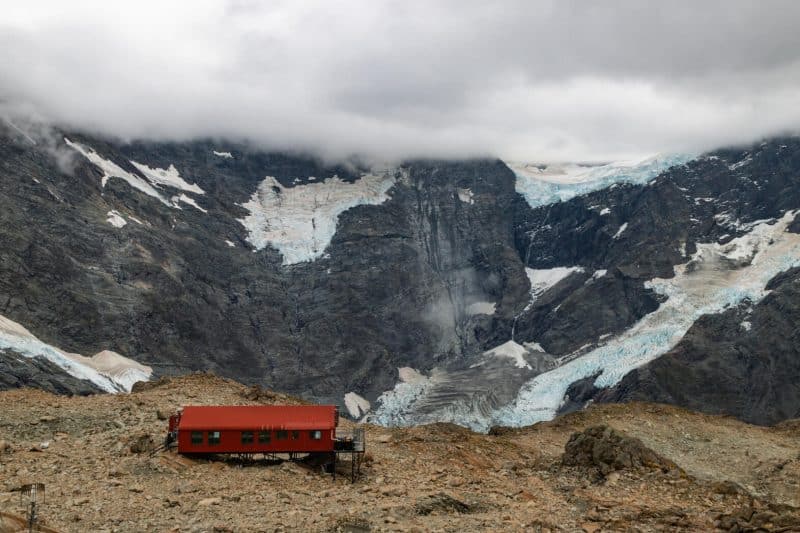
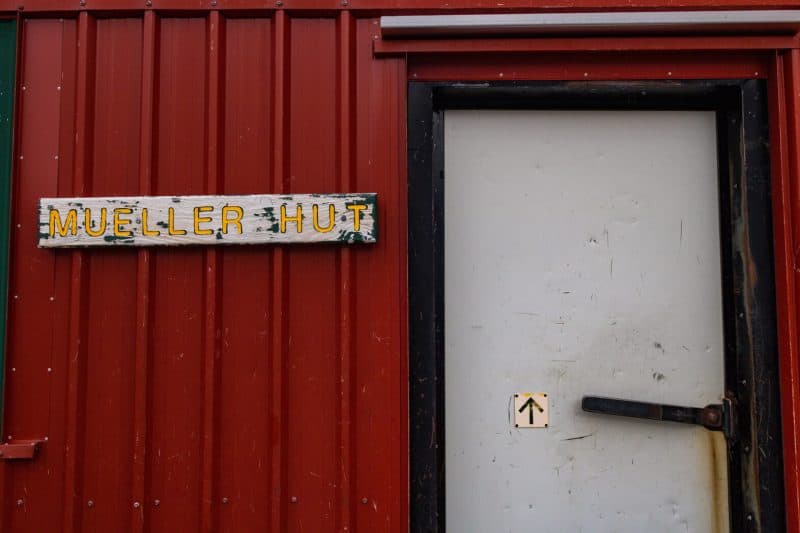
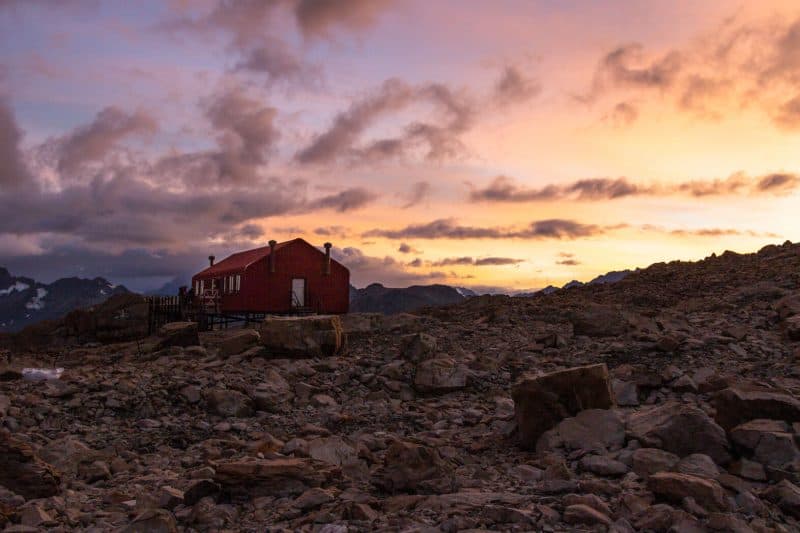
At literally the last few minutes of your Mueller Hut hike, you’ll finally see the bright red hut in the distance, pushing you through your last five or so minutes of the hike.
What a mysterious little tease this hut was!
For some reason, I had pictured the hut being in the distance for more of the hike, but instead, it remained a mystery until the very end.

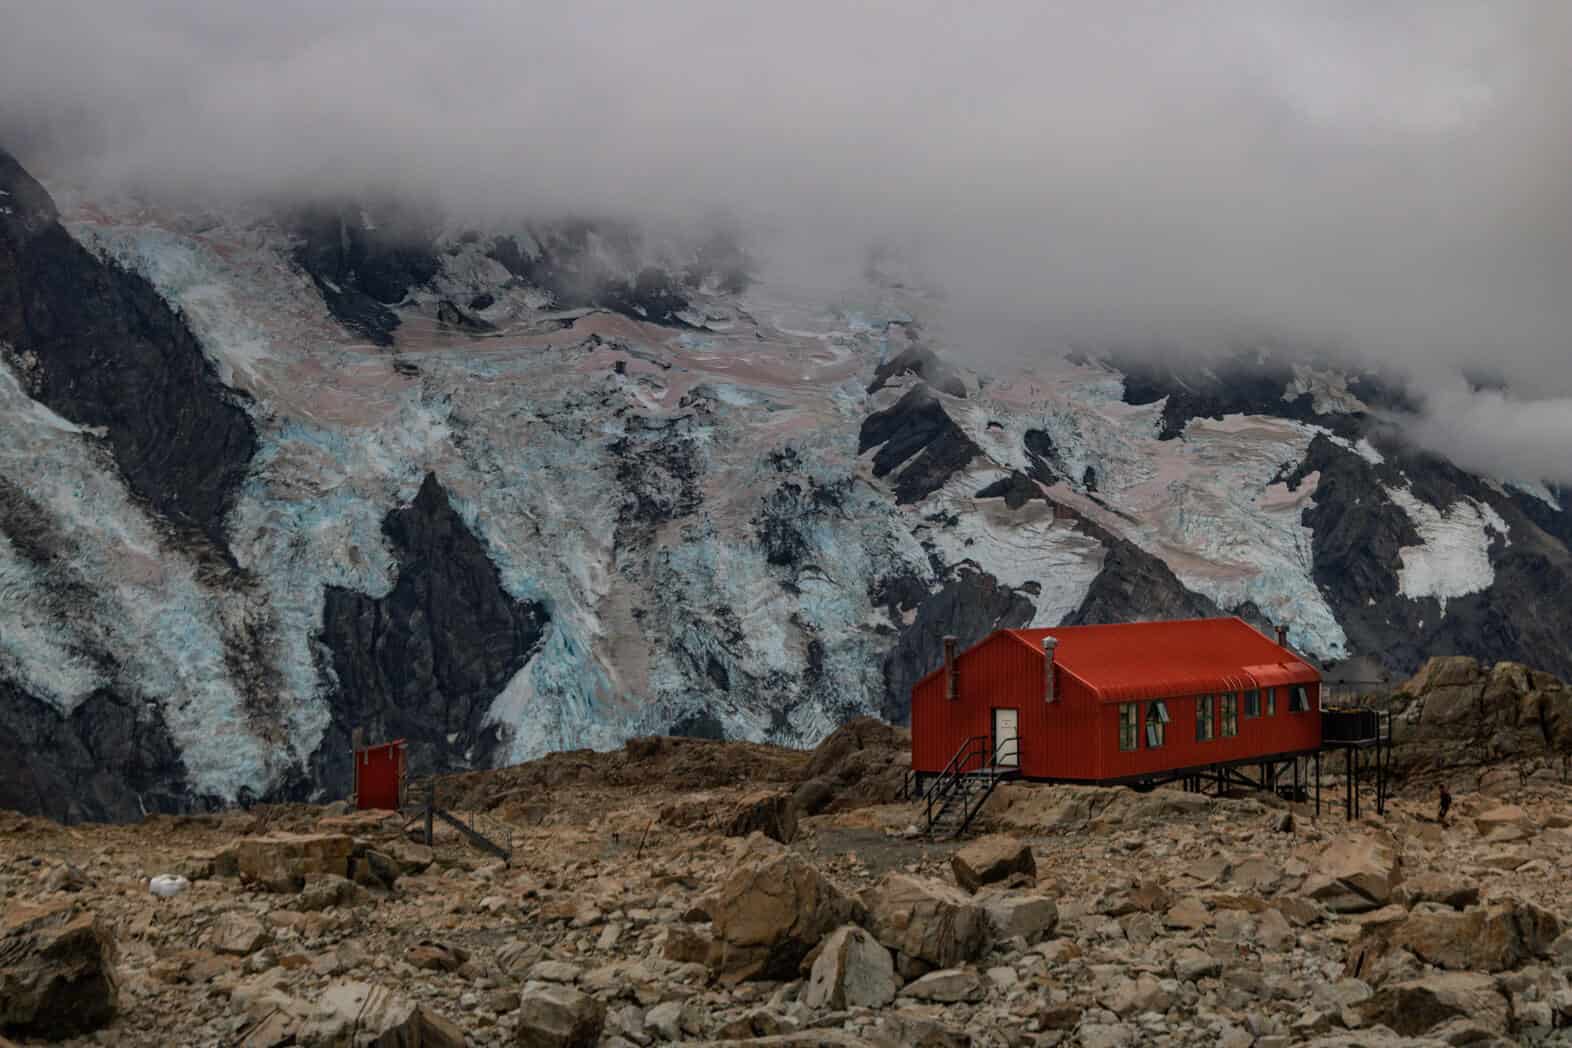
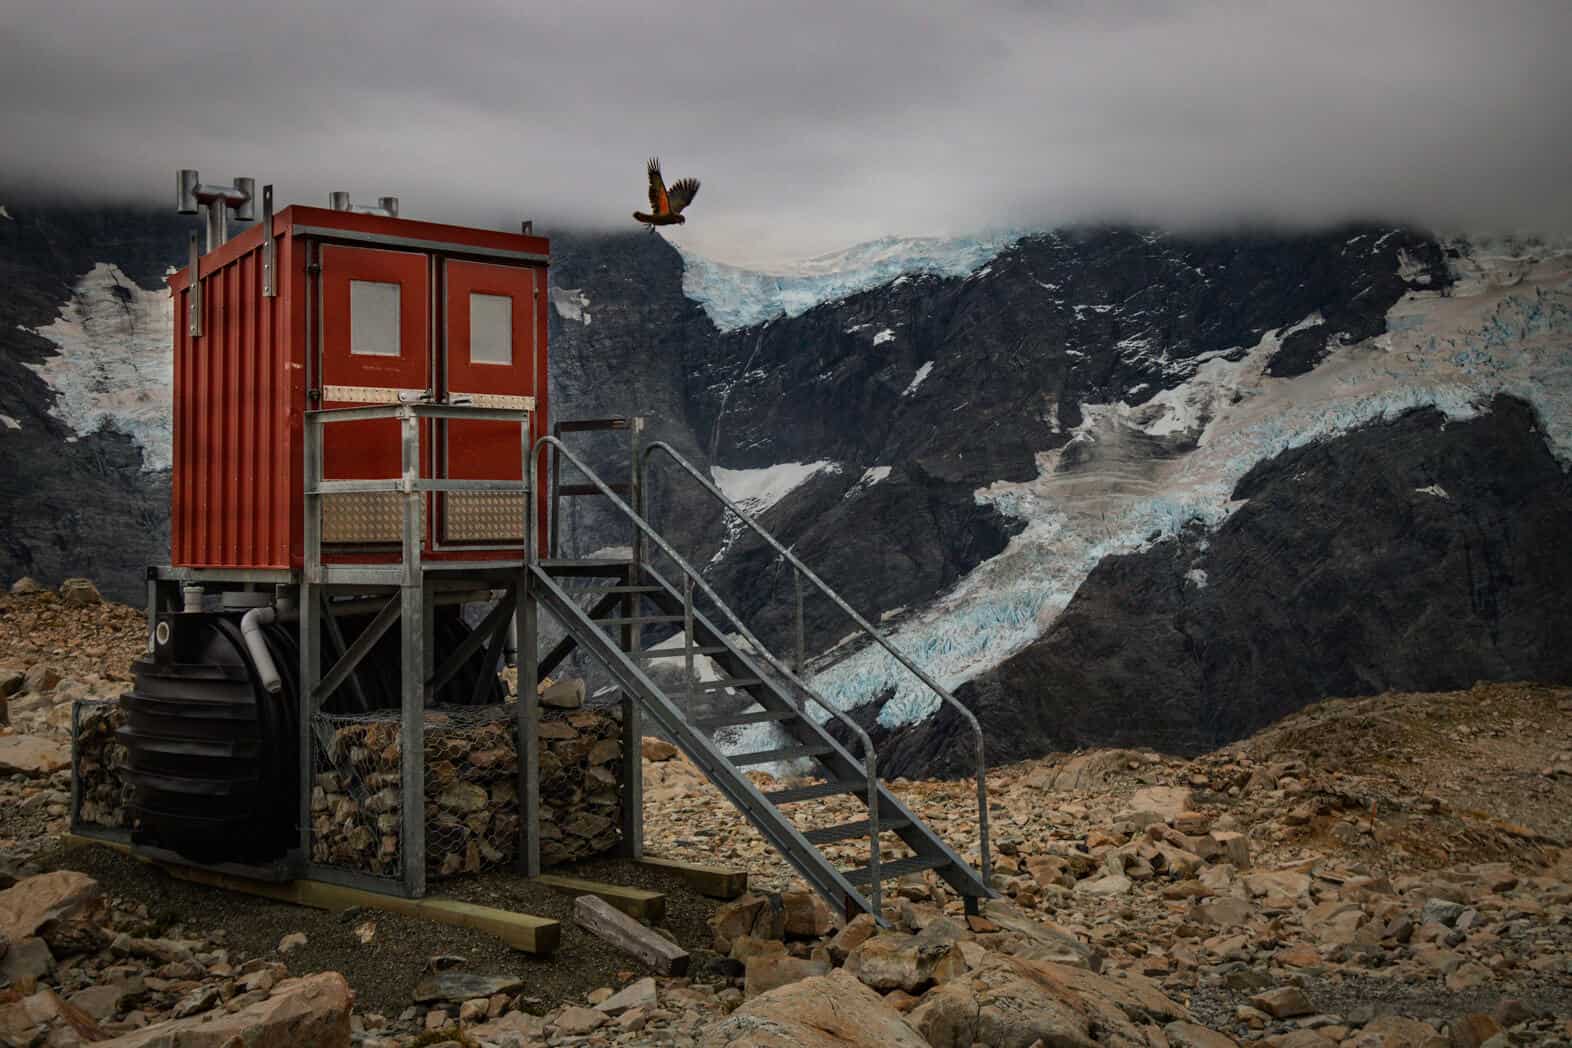
I finally made it. There’s the bright red bathroom with the best view as its backdrop, and a large balcony for all the hikers to finally relax at and gaze at their ultimate reward…
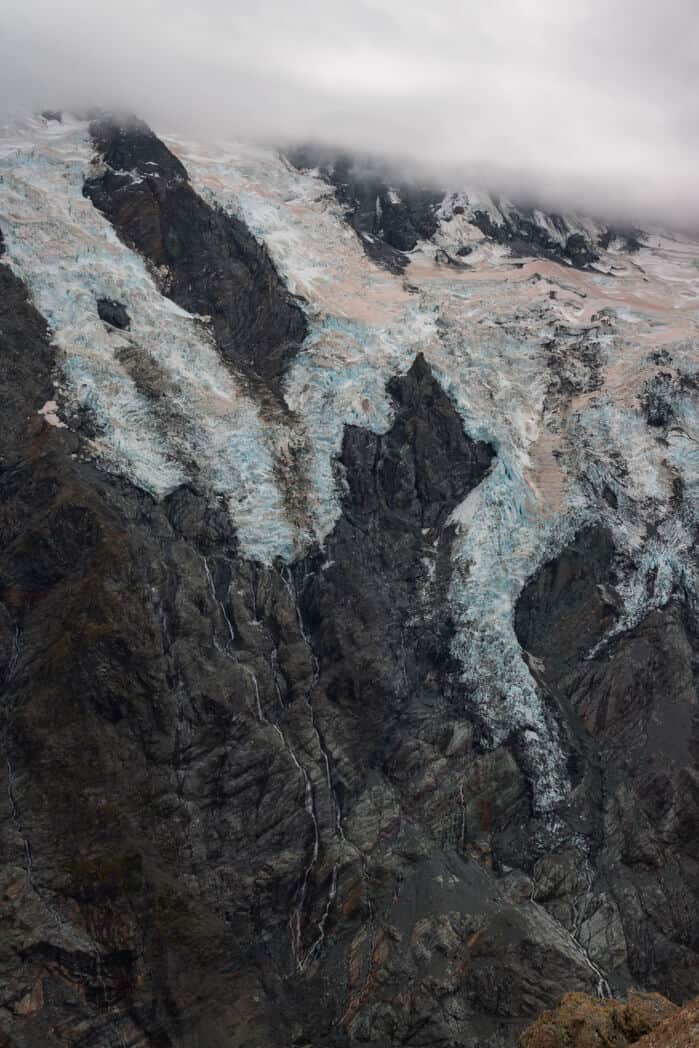
The glaciers that were once so high up from the campgrounds are now staring you directly in your face. Big and bold, with tinges of bright blue and dusted on top with snow and dirt. Every so often a massive crack breaks through to your ears indicating rocks are falling or an avalanche is happening.
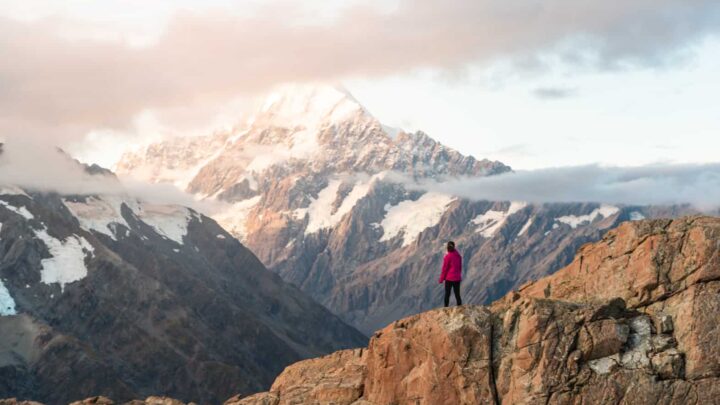
And to your right will either be a massive cloud, or the king himself, Mount Cook.
He’s cryptic and unpredictable. I hope you get a peek at him or even if you’re lucky, a full-on view of Mount Cook but it’s not always a possibility.
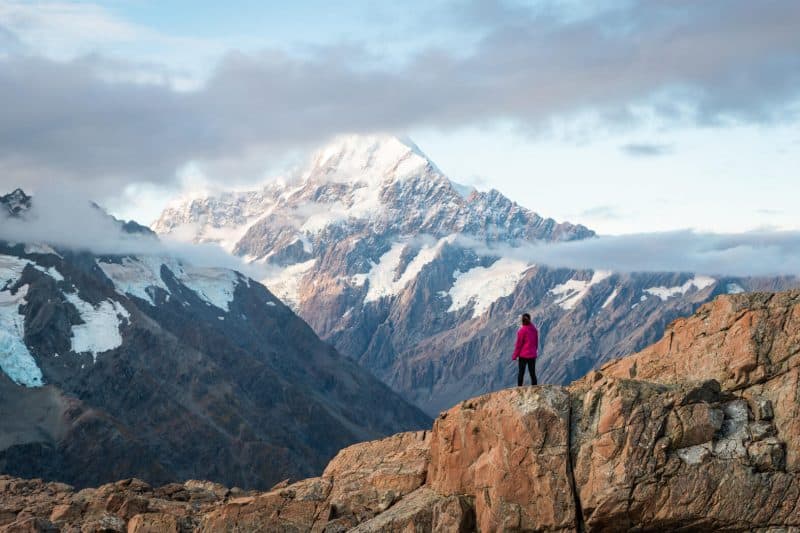
We got so lucky, and he came out to play just before sunset for a whole twenty minutes. After that, he went back to hibernating behind the thick grey clouds.
What Else Is There to See up at Mueller Hut?
What else could you want?! The glaciers in front of you, Mount Cook on the other side… But there is some more.
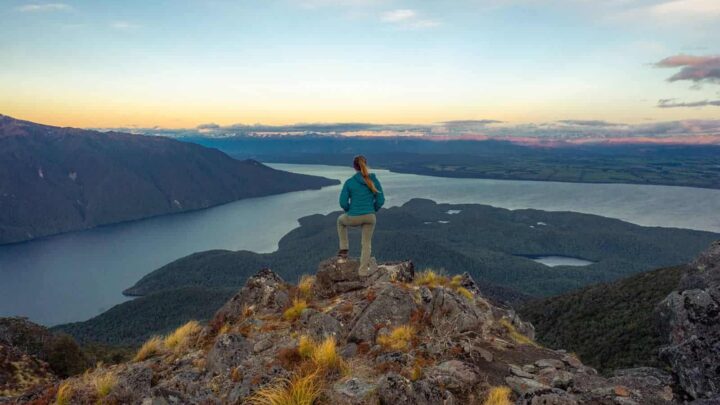
Take a walk, or should I say a scramble, on more rocks (yes, rock scrambling will get a bit old!) beyond the hut and you’ll get a glimpse at an alien-like valley filled with black sand, far away waterfalls, and more glaciers and mountains.
Walk up to the edge and get an even closer look at the glacier in front of you, and if you want to get even higher, you can climb up to Mount Olliver.
The peak just behind Mueller Hut is the ultimate rock scramble to end your rock scrambling for the day and is sketchy AF. Take care scrambling up Mount Olliver and be sure to peep over the other edge for a crazy view of Hooker Valley and a great vantage point for shooting Mueller Hut with the glacier in the background.
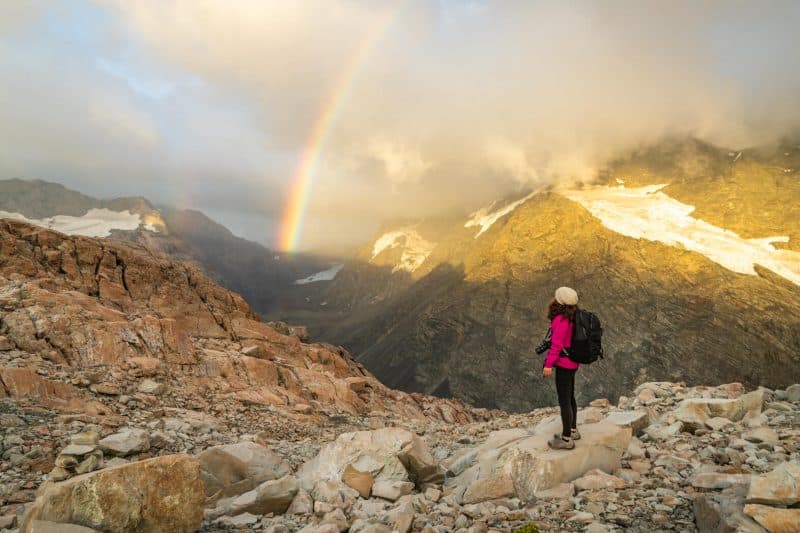
If you have a clear night, staying up late at one of the best places to go stargazing ever would be a wise choice.
And getting up for sunrise is a must!
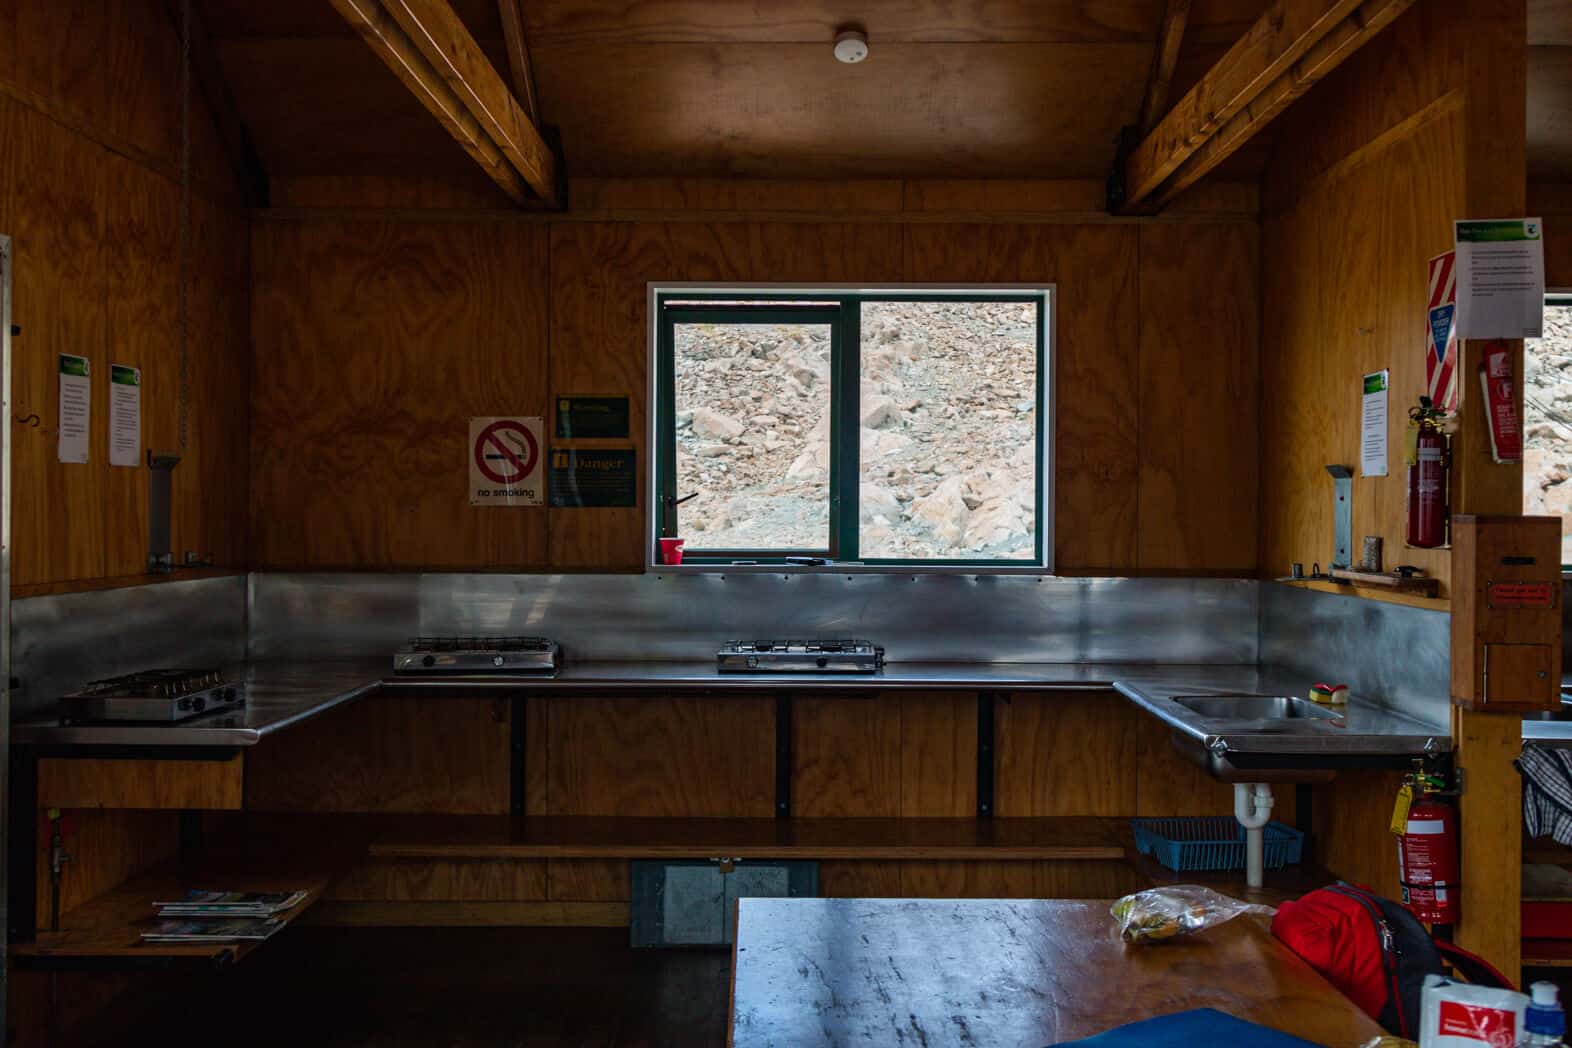
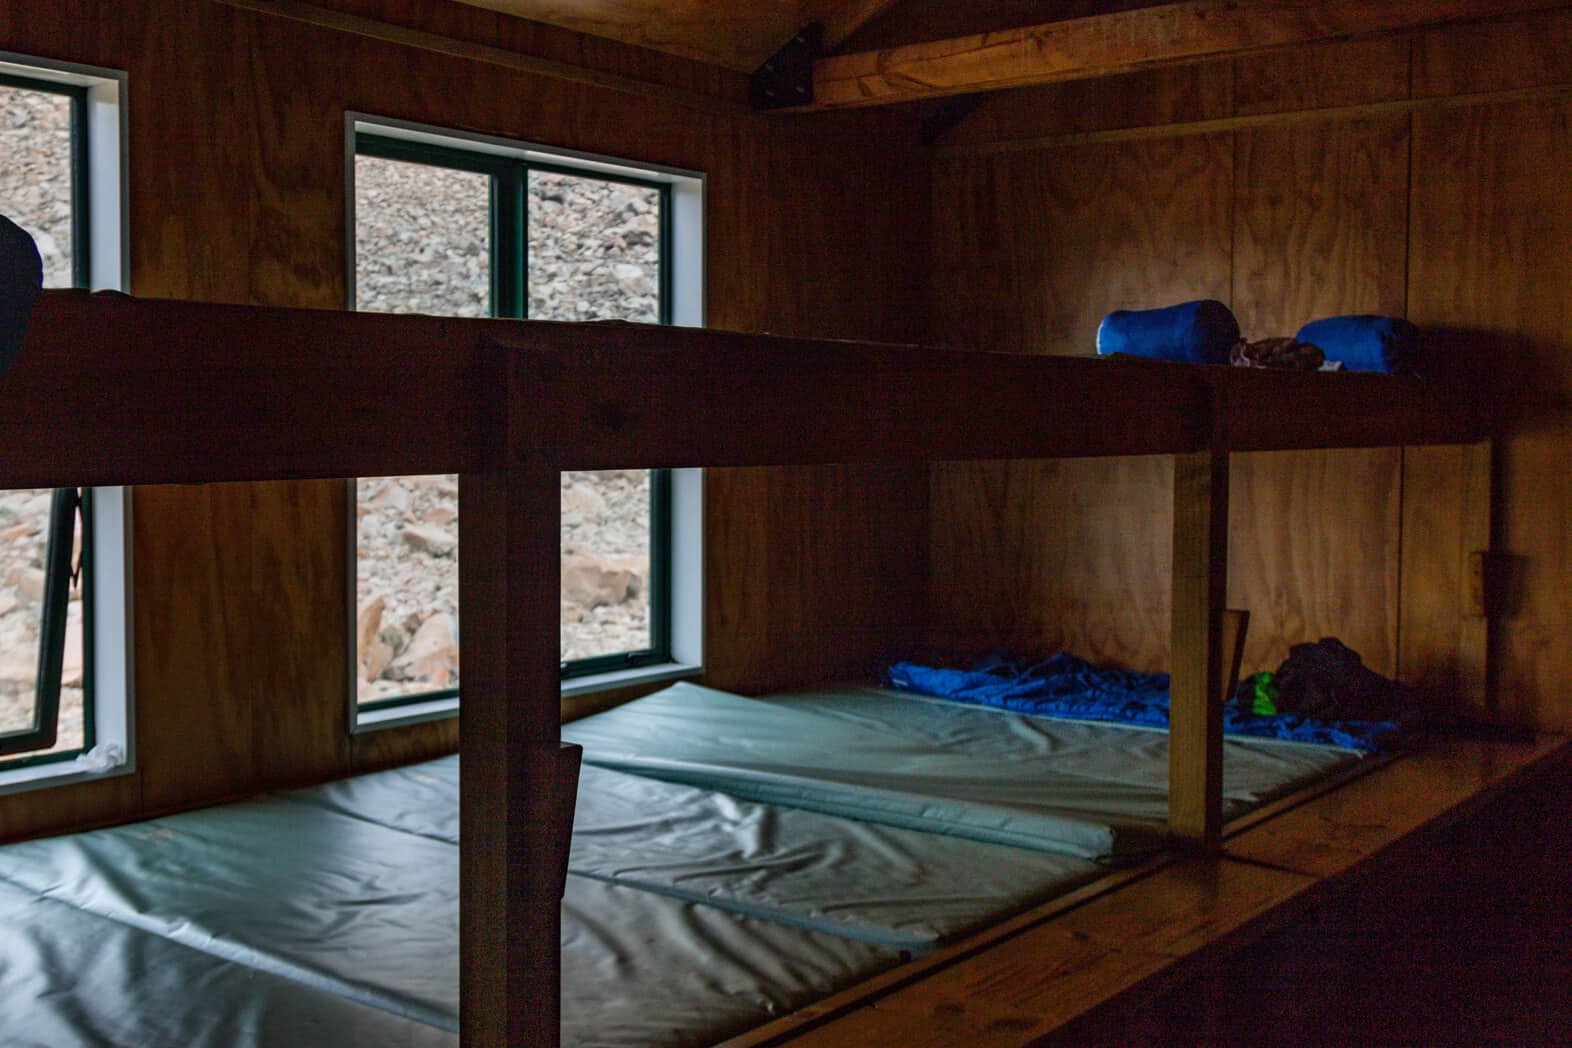
What Is It Like Staying in Mueller Hut?
Basic AF but also amazing.
- There are two large dorm rooms with thin mats in them.
- A kitchen that has gas burners, two sinks, and two big tables.
- An outside water tank with drinking water.
- And two bathrooms located outside.
And that’s it.
You’ll meet other people staying in the hut for the night, have some good chats, cook and eat your food, enjoy an epic sunset (hopefully) and then off to bed early.
Most people were in bed between 9-10pm.
I’m a light sleeper and just waited for the night to pass while going in and out of sleep. We would have woken up for some night photography but unfortunately, it was a cloudy night so no stars for us.
The kitchen does get a bit busy as there are 28 people allowed to stay at the hut and most of them all want dinner around the same time! We were smart and cooked our hot meal for a late lunch, so we just had other food that didn’t require cooking for dinner. We win!
Can I Hike to Mueller Hut as Day Hike?
Totally! The hike isn’t long; it’s only about 5-6 hours round trip. They are a tough few hours though on the rock scrambling parts and energy will certainly be depleted.
If you didn’t get a bed to stay in the Hut, you can still climb up, enjoy the hut balcony (use the bathroom), eat a snack, and head back down. Just start early enough to make it down before dark.
Packing List for Mueller Hut
- A lighter. They may have one for you to use, but it may be out… Bring one so you can use the gas burners.
- Headlamp. Not an option, the toilets are outside, and if you want to see a sunset, you’ll need one. Oh, and the lights may not work properly during the evening either like they didn’t for us!
- Toilet paper, there isn’t any there.
- Coffee and or tea if you want a hot beverage up here. We just brought coffee for the morning and wish we brought tea for the evening. You’ll need food too, and that list is below.
- Waterbottle. Of course! Luckily there’s drinking water at the hut so just bring what you need for the hike up.
- Antibacterial, there’s no soap up here.
- Trash bag. You MUST carry all your trash out and back down with you.
- Any cookware, utensils and bowls/plate or just eat out of the pot as we did. We only brought two spoons and a pot. Oh and one reusable to-go coffee cup for the morning (we shared).
- Sleeping bag, as there’s only a mat provided (your pillow will be extra clothes or a jacket clumped together)
- House shoes or at least comfy socks, they want shoes off in the dorm rooms and kitchen area.
- Chapstick. I kicked myself for forgetting mine.
- Earplugs as you’ll be in a dorm, but I never sleep in dorms anyway, so I didn’t bring any.
- Sunscreen. The hike is fully exposed.
- Trekking poles. Optional! We didn’t use any but many people decided to use them.
- Quickdry items like a tank or shirt and a pair of leggings or pants.
- Pants, preferably hiking pants, but just not jeans or cotton.
- Extra clothing. Something to wear the next day/sleep in—Preferably not bringing too many extra things. I brought something I could sleep and hike in/use as backup clothes in case mine got wet. You don’t need extra PJs.
- Sturdy hiking shoes, running shoes would not be good enough! I wore these.
- Accessories like a beanie and gloves to keep extra warm, yep, even in summer.
- Jackets. I lived in this light fleece jacket, and I brought just the shell from my favorite 3-in-1 jacket as rain is always a possibility in New Zealand and alpine conditions. I wore it at night to keep warm, I used it as my pillow at night, and then I wore it hiking down as it was raining on and off.
My Hiking Bag
…Was not a hiking bag at all.
When you travel as I do, you don’t have the luxury of having the best bag possible for every situation and I didn’t have my hiking bag with me buuuuut, my awesome cabin bag that I travel with, that’s also my anti-theft bag, worked just fine.
It fit everything to perfection, including the sleeping bag at the very bottom, so I didn’t have to tie it up on the outside. Garrett used the same bag. It has chest and waist straps, which is pretty much the most important thing for your bag to have.
Going up the stairs and hiking up to Mueller Hut would be tough without waist straps on a backpack and I wouldn’t recommend it.
What to Bring to Eat at Mueller Hut
Anything that packs light, and better yet, doesn’t need to be cooked much or at all.
We decided on the less cooking, the better. So the only cooked item we brought were two soup packets (not cans!), and we ate them for lunch when we got to the top. This way we didn’t have to cook when everyone else was cooking (which was made harder when the lights in the hut didn’t work well.)
So this is what we brought for two people, one lunch, one dinner and one breakfast each:
- Two soups
- Two cans of tuna and some crackers
- Muesli, nut, banana chips mix
- Two granola bars
- Dried apricots
- Four mandarins
- Two apples
- Coffee
The apples and extra muesli nut mix were meant for breakfast but we had too much fun at sunrise getting great photos and then wanted to hike down out of the rain, so we ended up not eating it all.
Don’t forget; you’ll need to bring what you need to cook so the less complicated, the better. The soup was easy to eat out of the pot, we didn’t need anything more than just two spoons, no can openers needed, nothing.

We do regret not bringing up a couple of beers or even some wine though. There’s no fridge, but they would have tasted great out of a dirty glass after that hike. We deserved them.
Details About Hiking and Staying in Mueller Hut
Distance: 5 miles / 8 kilometers
Difficulty level: Hard
Time: 5-6 hours round trip
Terrain: Steps up to Sealy Tarns and then rock scrambling to Mueller Hut. The hike is fully exposed.
Mueller Hut Trailhead: You’ll start at the Sealy Tarns/ Mueller Hut trailhead which is located at the White Horse Campgrounds. You can also begin at Mount Cook village.
It took us about 3.5 hours to make it up with a break at the viewpoint. It can take longer if you’re fitness levels aren’t up to par.
Do note the hike becomes significantly more dangerous and challenging if it’s raining as the rock scramble will get slippery. If the trail gets engulfed by a cloud, you’re in even more trouble as you may not be able to see where the orange markers are.
Staying in Mueller Hut:
- You MUST make a reservation to stay at Mueller Hut. You can do so on the DOC site. It’s $36 in season and $31 in the off season. It’s $15 if you want to pitch a tent.
- You must bring your own supplies as outlined above, there’s nothing up there.
- You have to check in at DAY OF your hike at the Mount Cook center to get your tickets and to get a rundown of the day’s weather and any potential warnings. There is no option to do this any other day but the day of your hike.

Notes About Mueller Hut:
- The experience I listed above was from my hiking experience, in March, which is summer.
- Extra care must be taken when hiking in off season.
- Mueller Hut isn’t a secret, and you should probably book it sooner rather than later as it does book out. I made ours a little under a month in advance. Cancellations do occur though so stalk the website, and you can still get a spot.
- I’ll stress this again, the hike is a bit hectic and can get dangerous quick, so make sure your level of fitness is up to scratch, and you’re properly prepared. On that same note, I’m no major athlete and I was fine.
- DOC, The Department of Conservation, is very helpful and if you have questions on weather, fitness levels, etc, just give them a ring. You can talk to a real human about current conditions and get advice. NZ makes this very easy for visitors!
More New Zealand Hikes

So are you down to hike the Mueller Hut track? Let us know in the comments!
>>> EVEN MORE ABOUT TRAVELING NEW ZEALAND <<<
Work & Travel New Zealand: Get a Working Holiday Visa for New Zealand
A 5-Day Queenstown Itinerary For the Intrepid (New Zealand)
2-Week North Island, New Zealand Road Trip Itinerary
New Zealand Road Trip Itinerary—2 Weeks to 2 Months + Costs and Tips
20+ Day New Zealand South Island Road Trip Itinerary
Campervan Sites in New Zealand + Camping and Food Tips
Campervanning New Zealand: Buying, Selling, Renovating, and Tips
New Zealand Travel Tips + A Budget Breakdown
Piha & Waitakere Ranges Walks, Waterfalls, and Beaches—New Zealand
A Guide to The Pouakai Circuit & Hut at Mount Taranaki (New Zealand)
11 Fab Things to Do in The Coromandel, New Zealand
Epic Things to Do in Rotorua—Hot Pools & Adventures
7 Tips For The Cathedral Cove Walk in The Coromandel, New Zealand
A Guide to Hiking French Ridge Hut in Aspiring National Park (New Zealand)
Hooker Valley Track: The Easiest & Most Beautiful Hike in Mount Cook NP (New Zealand)
5 Things to Know about Milford Sound, How to See It and Is It Worth It? (New Zealand)
An Adventurer’s Guide to Exploring Lake Tekapo, New Zealand
4 Easy But Beautiful Walks Around Dunedin, New Zealand
11 Things to Do in The Catlins in 2 Days (New Zealand)
A Guide to Exploring The Cave Stream Scenic Reserve (New Zealand)
Hi Nina
Great read. I’m head there in a fortnight and this has given me a very good insite as to what to expect.
Keep it up and enjoy your adventures
Easy to read. Thanks Heaps
Russell
Have an awesome time!!
Hi! Thank you for sharing your experience! For someone who has never hiked a mountain anywhere close to this size, would you suggest not hiking to Mueller Hut. I am in awe of these views and think it is overshadowing my ability to make the right decision.
It’s honestly not that bad. Remember – the distance posted is round trip! Start earlier, get to Sealy Tarns, evaluate how you feel. If you want to stay in the hut though, you’d need to book beforehand and push yourself to make it.
Wow. I followed a link on Facebook and read your post. It’s a great read and the climb would be too difficult for me but I loved the adventure and fantastic photos!
Thank you!