Your 1-3 Day Yosemite Road Trip Itinerary (Plus Tips and Where to Stay!)
You know when you keep hearing about a place and your expectations get wildly out of hand, so that by the time you get there, you’re like, “oh… is this it?” (No? Just me?!)
Well, Yosemite National park is NOTHING like that.
My Yosemite road trip was absolutely amazing and the park deserves the hype. Yes, it’s actually THAT good. And I will admit, I’m a bit hard to impress.
The only thing that wasn’t great was how MASSIVE the park is. You need literal weeks to tackle the park but who has that amount of time?! Luckily, I did all the crazy and intense research for you and gathered all the worth it hikes and viewpoints for your Yosemite Itinerary!
Table of Contents
Things to Do on Your Yosemite Road Trip Itinerary
Let’s discuss the epic things to do around Yosemite first, then we can talk about how to organize your itinerary, some tips, things to keep in mind, and where to stay!
My Favorite Yosemite Hikes
The best way to get to some of Yosemite’s best sites requires a hike. Here are some of the better ones (in my opinion) that aren’t TOO crazy or long but give you MASSIVE rewards.
1. Vernal Falls to Clark Point Hike (My Top Hike on My Yosemite Itinerary!)
Distance: 4.2 miles
Type of trail: Loop
Difficulty: Hard
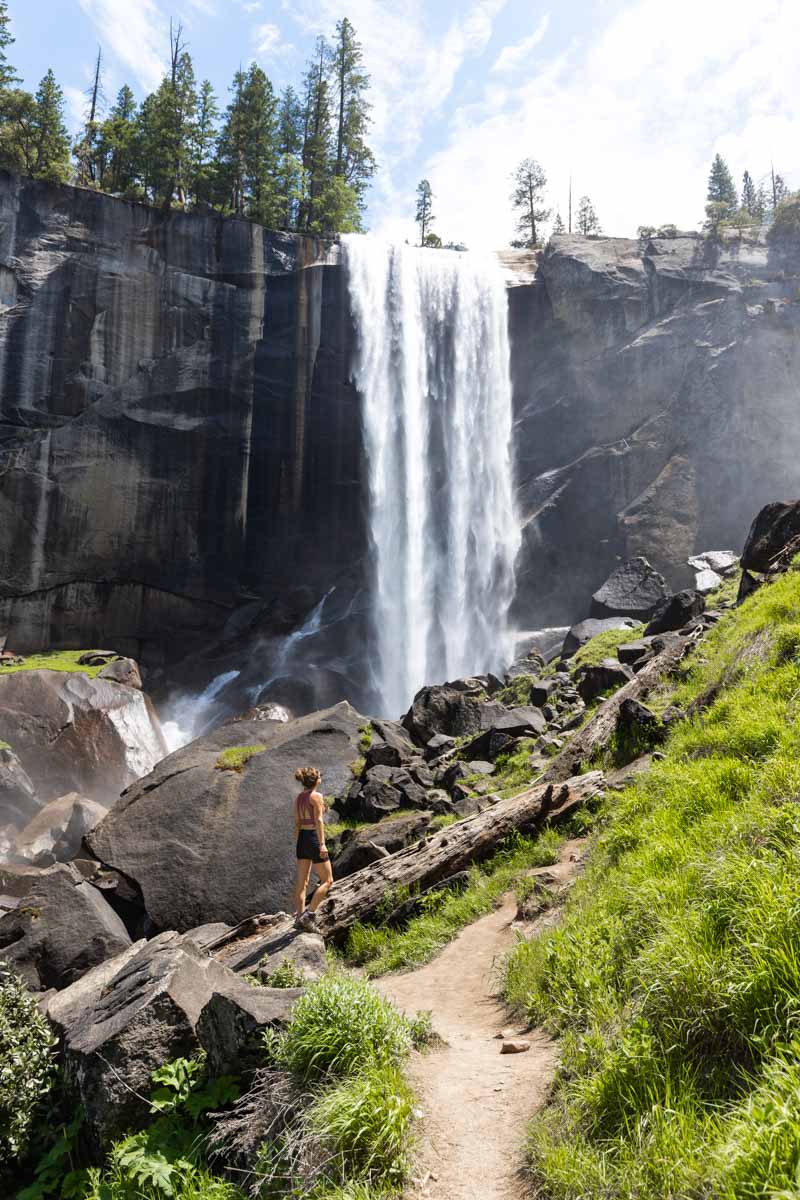
Does Yosemite’s signature hike live up to the hype? Hell yes, it does! Should you give it a go on your Yosemite road trip? Yes! What’s not to love about a hike up the cliffs of one of the most visually stunning valleys in the world, with a waterfall at the end to reward your efforts?
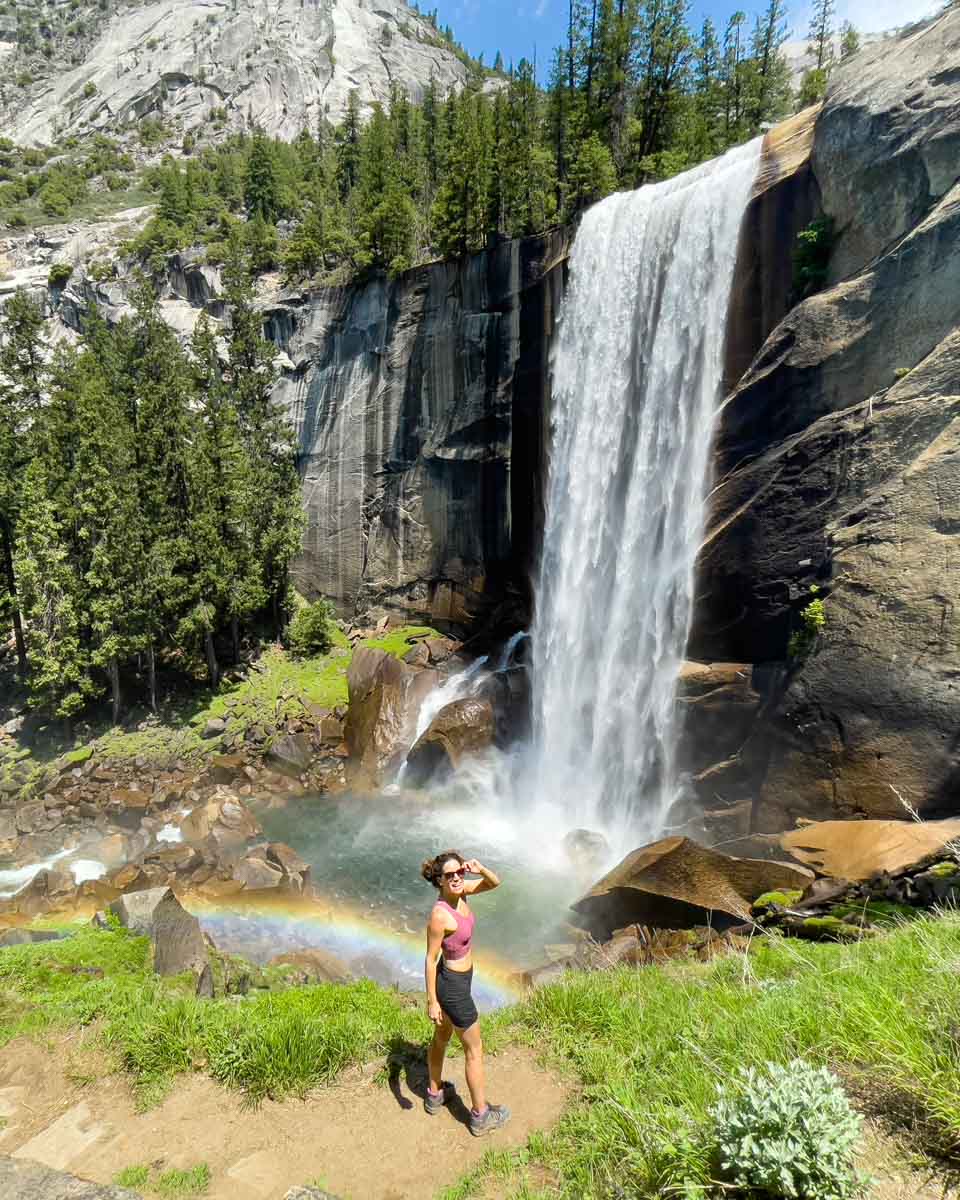
The trail to Vernal Falls is often referred to as the Mist Trail, which sounds pretty cool in itself. This epic hike will take you up close and personal to the pounding Vernal Falls, with a scattering of incredible views the whole way along.
You’ll be able to get close enough to the falls that you actually can feel the spray on your face, but be prepared to share the sensation with the crowds.
Once you reach the falls, you can continue your hike up to Clark Point via the John Muir Loop, and head back via this trail rather than the Mist Trail. This way, you will also be able to take in the view of Nevada Fall, Liberty Cap, and the back of the iconic Half Dome as you return via a different trail, the John Muir Trail.
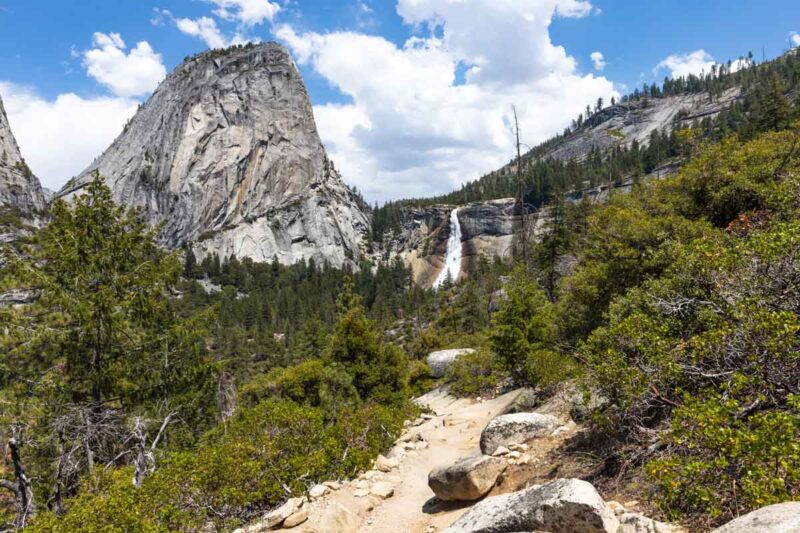
Although this is a little longer and requires a bit more climbing after Vernal Falls, it is a lot less crowded and you will be able to take in some different views as you switch back down the mountains.
Other options for this hike:
- Short on time? Take the out and back trail to the falls, so you still get to take in the incredible falls and stunning scenery. Instead of continuing on to Clark Point, you can feel the mist on your face before turning around and heading back the way that you came. It’s still about 4 miles round trip either way but it will all be downhill so it won’t take as long.
- This combination of trails not enought for you? Increase the challenge by adding on a trip to Nevada Falls, and then heading back via the John Muir Trail. Be prepared, this hike a lot longer, but you’ll get two incredible waterfall sightings instead of one, which makes it so worth it right? It is challenging, but you won’t regret it. This makes it a 7-mile round trip hike.
2. Sentinel Dome and Taft Point Loop Hike
Distance: 5 miles
Type of trail: Loop
Difficulty: Moderate
Get two incredible views in one with both Taft Point and Sentinel Dome, so make sure you have it on your Yosemite itinerary!
Taft Point is located on an exposed ridgeline, giving a pretty dramatic vista of the valley below you, whereas Sentinel Dome sits high above the well-known Glacier Point, again, offering panoramic views that seem to make the climb entirely worth it.

Getting to Taft Point is not too strenuous, as once you leave the trailhead you’ll mostly be traversing through the tall forests that cover much of the Yosemite region. After less than a mile, the trees will begin to fall behind you and open up to Taft Point, a ridgeline high above the valley.
There are some potential hazards here. There are of course the vertical cliffs to look out for, but also fissures in the rocks, so watch your footing.
If you’re planning on doing the full loop, head back the way you came from the viewpoint and begin to follow the Pohono Trail, which will take you up to Sentinel Dome. You’ll get a few peeks of the view as you go, but they are nothing compared to the grand finale.
You’ll have to work for it though, as the trail starts to head very much uphill, but before long you will reach the top of the dome.
The great thing about this hike is that the two viewpoints could either be done separately, or as part of a loop, so if you are short on time you could choose to head directly to Taft Point or Sentinal Dome and back, and still witness some pretty awesome views of the valley.
If you only have time for one, I’d choose Sentinal Dome!
3. Upper Yosemite Falls Trail
Distance: 7.6 miles
Type of trail: Out & back
Difficulty: Hard
This is the only one I didn’t do but Garrett did and loved it when he went so I had to include it!
Covering a distance of 7.6 miles, Upper Yosemite Falls Trail could be considered a little on the more difficult side, taking between 6 to 10 hours to complete. With such a steep climb, you’ll certainly be getting a workout, but the payoff is worth it.
Once you reach the peak, you’ll be able to take in almost the whole of the Yosemite Valley spreading out like a postcard in front of you, and if you’re hot from your hike, the spray from the falls will do a good job of cooling you down.
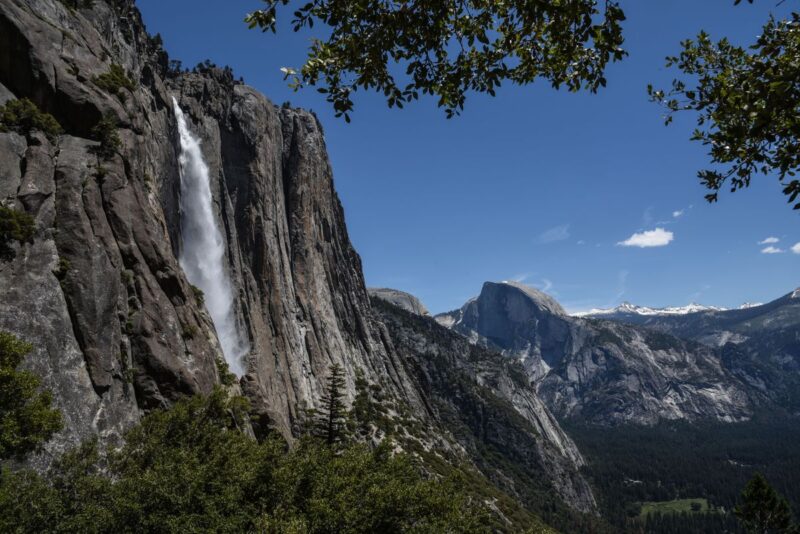
Essentially, you’ll be climbing from the valley floor all the way up to the top of Yosemite Falls, which is an elevation gain of 2,600 feet. The beauty of a difficult hike is that the trail will not be as crowded as some of the easier ones in the area.
As you march up the steep steps, you’ll be surrounded by Ponderosa pines, oaks, cedars, and bay laurels before revealing some of its views on route. You should be able to spot Sentinel Falls, as well as other snatches of the valley below you.
Tip: Be sure to go at the start of the summer to see the falls at their very best.
RELATED: Your Southwest Road Trip Itinerary (1 Week – 2 Months)
Another option – Columbia Rock Trail
Distance: 2.1 miles
Type of trail: Out & back
Difficulty: Moderate
If you don’t have the time to take on the Upper Yosemite Falls Trail in your Yosemite itinerary or feel like it may be too strenuous, then the Columbia Rock Trail is a good alternative. This hike is just over 2 miles long, with an elevation change of 985 feet.
Most people take in the views of Yosemite Valley either from the valley floor or some of its higher peaks. The Columbia Rock Trail gives you the unique viewpoint of somewhere near the middle, at the northern wall of the valley. Columbia Rock is on the Yosemite Falls Trail, so if you’re feeling up to it you could easily carry on.
The trailhead is at Camp 4 near Yosemite Valley Lodge, and the north end of the parking area. You’ll enter and wooded area and should follow the path for the Yosemite Falls Trail. After passing a huge boulder, the challenge really begins, as you tackle the valley wall via a series of switchbacks up to Columbia Rock.
You’ll be able to see glimpses of the valley as you ascend, but it’s worth reaching the Columbia Rock viewpoint to get a proper view of the valley, which includes an impressive perspective of Half Dome, Sentinel Dome, Eagle Peak, and Cathedral Rocks.
Yosemite Falls is not actually visible from this viewpoint. If you wish to reach the Upper Yosemite Falls from here you’ll have to continue on the trail for a further 2.4 miles.
4. Valley Floor Loop Trail
Distance: 13 miles
Type of trail: Loop
Difficulty: Easy
If you want to see as much of the park as possible without having to move your car on your Yosemite road trip, then the Valley Floor Loop Trail is likely your best bet. This is a seriously long trail at 13 miles, so either be prepared to take a very long walk or use a bike, which is the recommended method of getting around the whole loop in a day.
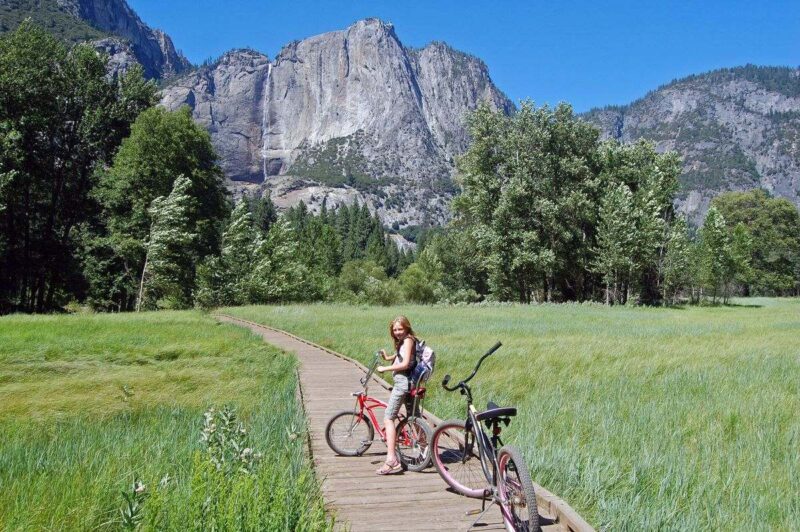
Overall the trail is mainly flat, with just a few gentle hills on the valley floor. Although part of the trail is near a road, for the majority of the time you’ll be traversing through open meadows at the base of the granite walls that tower above you.
If you’re starting from the Lower Yosemite Falls area, you’ll want to head west, meandering your way through the valley to the impressive El Capitan.
RELATED: 27 Incredible Waterfall Hikes on the West Coast, USA
Best Views and Chill Areas for Your Yosemite Itinerary
I’m not a total psycho! I didn’t hike the ENTIRE time I was there, although I totally could have. Everything is that gorgeous, but alas, my legs started to get wiggly and weak. Luckily you don’t need to work too hard to get stunning views on your Yosemite itinerary.
There are a lot of areas that are drop-dead gorgeous and only require stealthy parking skills because this place fills up! More on that in a minute…
5. Tunnel View & Artists Point
This is without a doubt one of the most famous views of Yosemite, the sort that you’ll see on posters and postcards, mugs and hoodies, magnets, and everything in between, but it is famous for a reason. You can’t go on a Yosemite road trip without ticking Tunnel View off your bucket list.
From this viewpoint, you’ll get to take in the whole of the Yosemite Valley, which is impressive in itself, but chuck in Yosemite Falls, one of the largest waterfalls in North America as well, then you’ve got a sight that really will take your breath away.
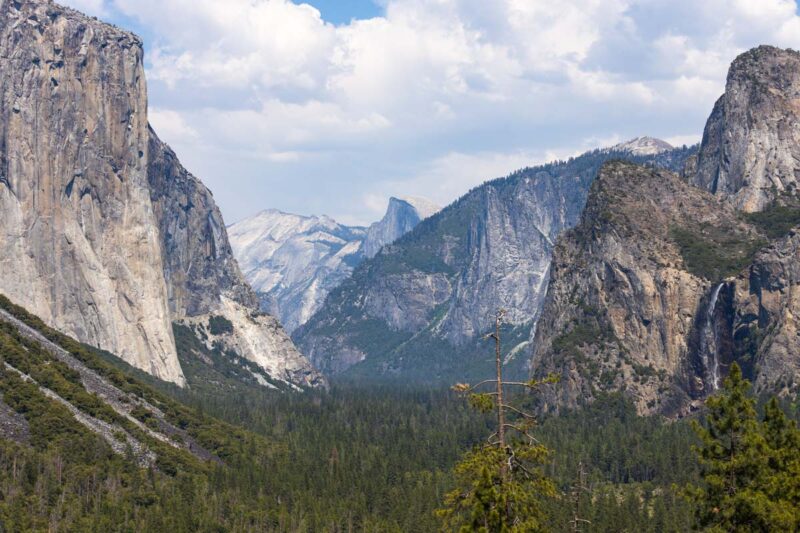
Tunnel View can be found at the western entrance to Yosemite Valley, perfectly framed by a blanket of Ponderosa pines.
If you want to get a better view and have a bit of time, you should try taking the Artist Point Trail. Although the view at the end of the trail is similar to Tunnel View, it is much clearer as you will have fewer trees (and people) in the way.
As a short 2-mile round trip, it is easily accessible, and you’ll be able to see a few things that you can’t see from Tunnel View, such as Bridalveil Meadow, Royal Arches, and a few corners of the Merced River. The trail starts from Tunnel View, and although it can be rocky, the path is relatively easy.
Getting to this viewpoint is not too tricky, as you can drive right up to it. There is a parking area on the right side of the road before you reach the tunnel.
RELATED: 17 Legendary American Road Trips
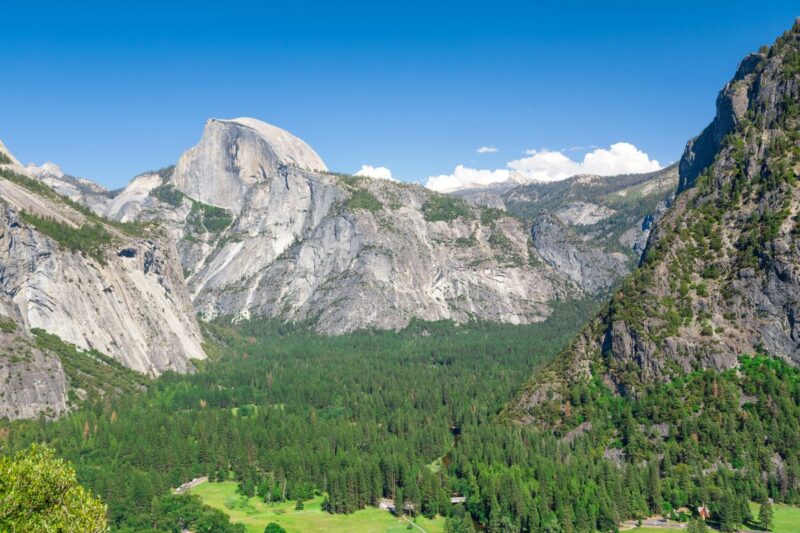
6. Yosemite Valley View
When you think of viewpoints, the first thing that comes to mind is getting up high and looking down, but have you ever thought about just looking up?
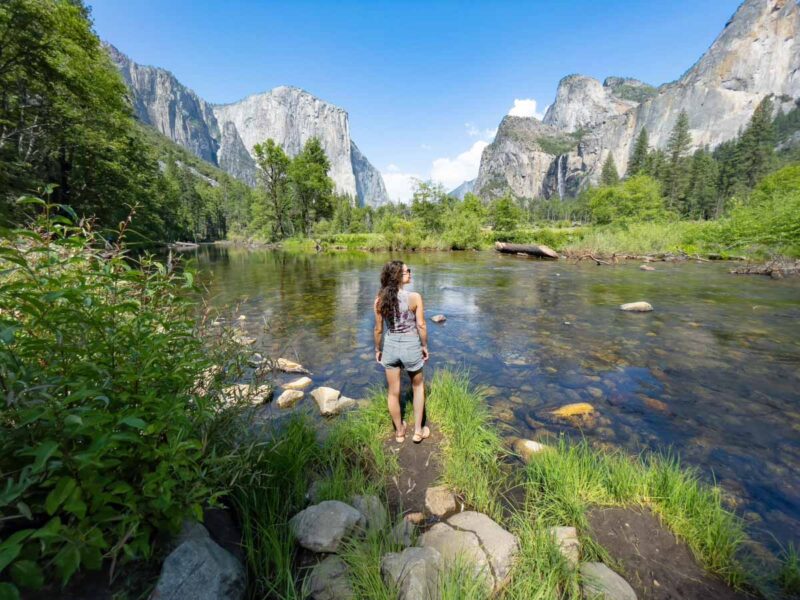
Valley View offers a view of the valley from a different perspective, and from here you’ll also be able to take in the gentle sweeps of the Merced River. The granite formation of El Capitan reaches 3,000 feet up into the sky in front of you, with Cathedral Rocks and Spires standing to attention opposite it.
This viewpoint can be found by the South Entrance, near the Mariposa Grove of Giant Sequoia. For just a roadside pull-out, it packs a lot of punch.
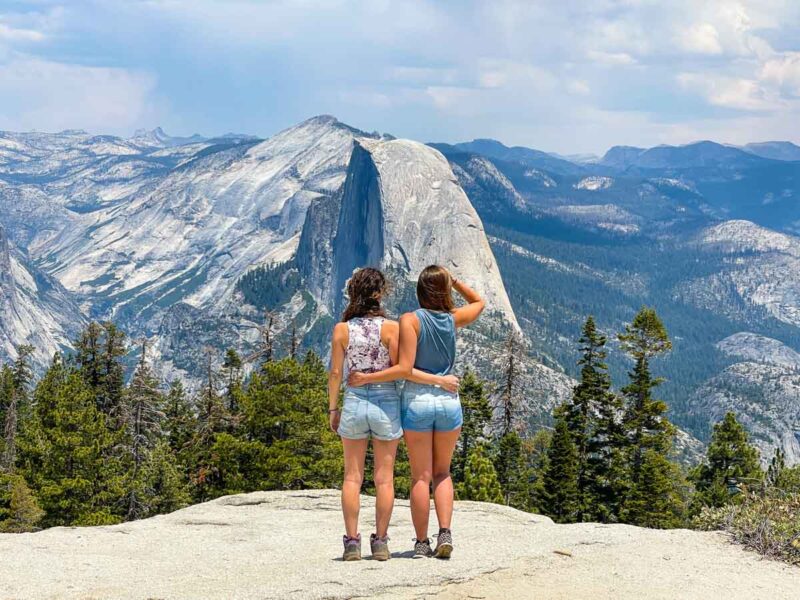
This is another of Yosemite’s many famous viewpoints, and from here you’ll get one of the best views of Half Dome in the entire park. Plus, you’ll still be able to take in much of the valley and Yosemite Falls.
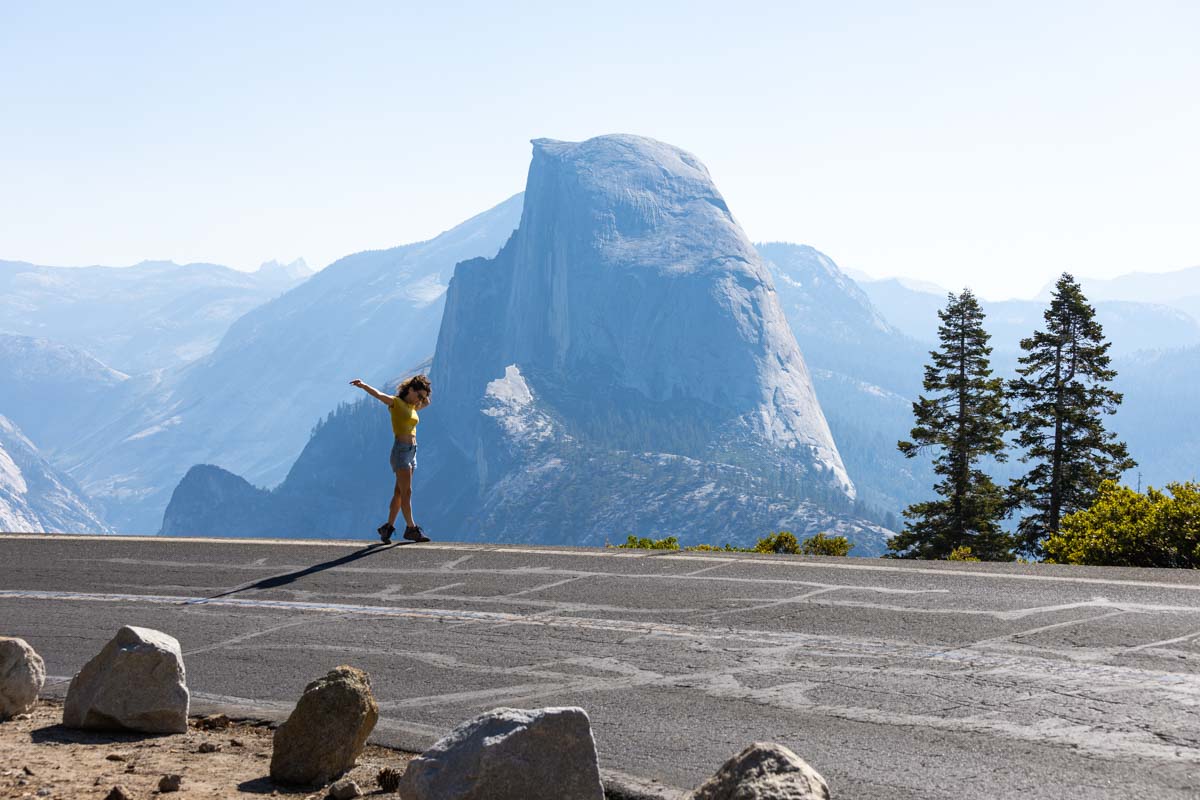
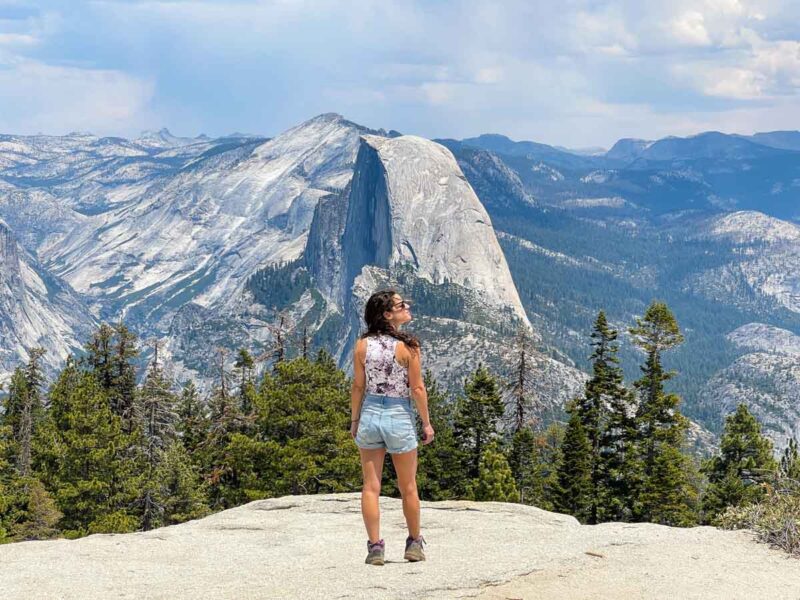
7. Glacier Point (My Fav Place on My Yosemite Road Trip!)
At one of the highest points in the park, it is hardly surprising that Glacier Point also boasts some of the most spectacular views. At 3,200 feet above Half Dome Village, you’ll be able to take in the majority of the most notable landmarks.
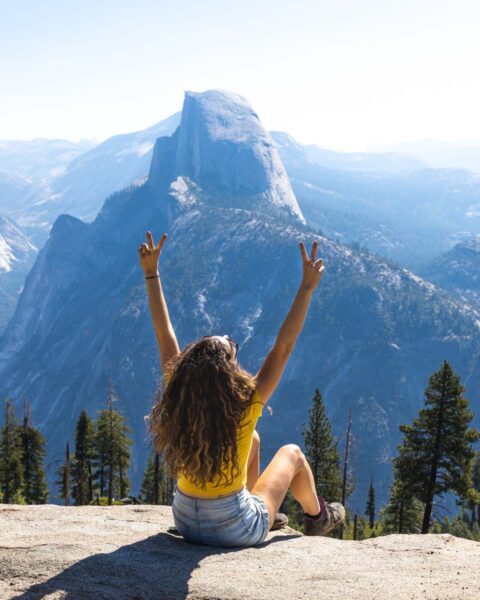
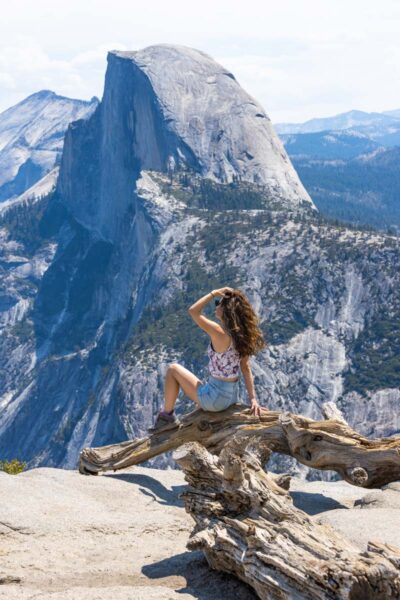
If you visit as the sun is setting, you’ll witness one of the most incredible scenes unfolding in front of you, with the impressive Half Dome basked in an otherworldly glow.
Glacier Point is mainly accessible by car, but not all year round depending on the snowfall. The road is only open from late May through to October or November. It is about an hour’s drive from the valley, right at the end of Glacier Point Road, but it is well worth the drive.
8. Washburn Point
Washburn Point is a beautiful viewpoint and can be accessed almost directly from the parking lot, which is pretty handy if you’re short on time on your packed Yosemite itinerary.
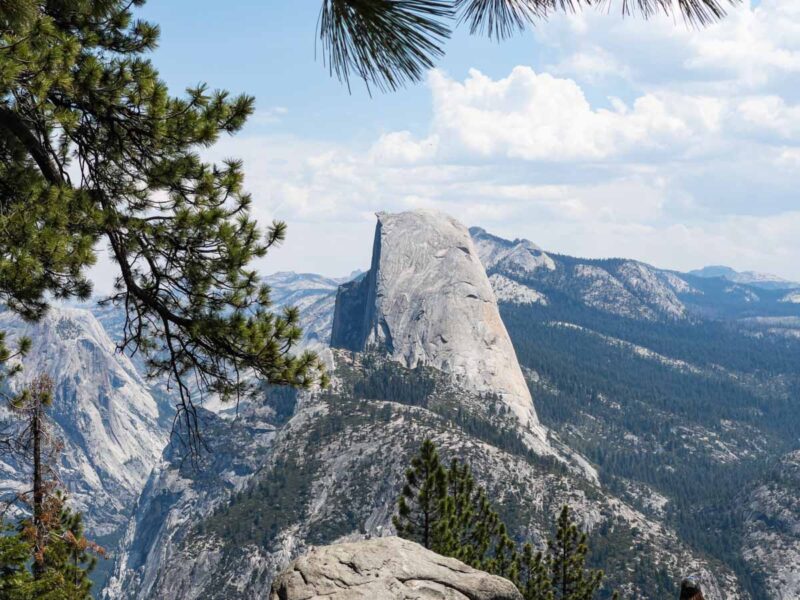
You’re at an elevation of 7,500, so the view is pretty extensive, and you’ll be able to see Half Dome and the valley without any effort from here.
Three waterfalls can be seen from Washburn Point, Vernal Falls, Nevada Falls, and Illilouette Falls.
Washburn Point can be accessed either on the way or on the way back from Glacier Point, so you could easily combine the two trips. There is a relatively big parking lot, so you shouldn’t have any trouble getting a space.
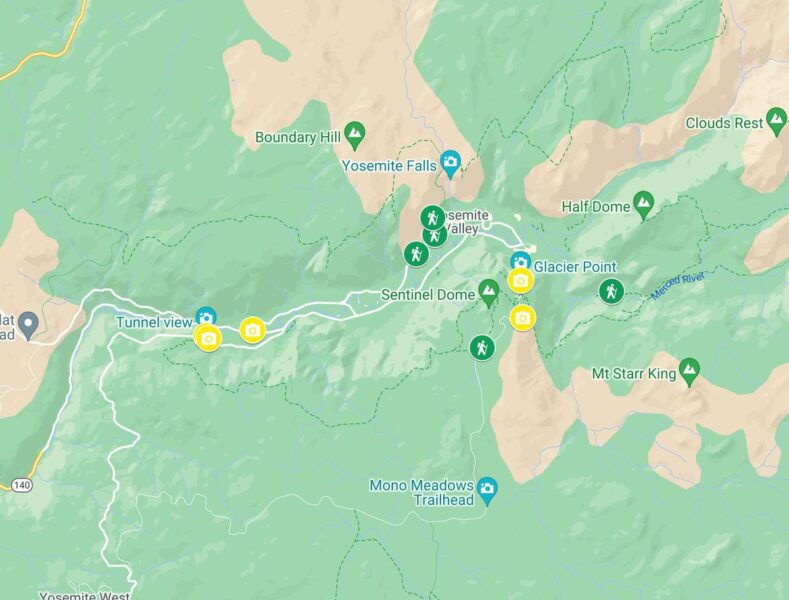
Your Yosemite Road Trip Itinerary 1-3 Days
Yosemite is MASSIVE. In fact, the Valley is an hour from Glacier Point and this was the BIGGEST mind f*ck for me. I even stayed just outside the park, a mere 10 minutes from the entrance, and each day I drove about an hour just to get where I was going.
I wasn’t understanding how this place could be so large and spread out! So if you take anything from this post—understand that this park is MASSIVE and plan your Yosemite road trip accordingly.
3 days or more is, of course, ideal but I know not everyone will have that kind of time. So here’s how I’d break everything down depending on the amount of time you have.
Yosemite Itinerary Day 1
Head in, and visit Glacier Point. This was my favorite area and while the Valley and Glacier Point are both busy, The Valley will naturally have more people at all times since it’s where most people head to and where most of the things to do are.
Enjoy Glacier Point strolls and viewpoints and hike Sentinel Dome and Taft Point! If you have time, drive around The Valley floor as you will see amazing views without even getting out of your car. And considering the parking situation… This might be your only choice!
Yosemite Itinerary Day 2 + 3
Got a second day? Amazing! Then I’d definitely do the Vernal Falls hike, and if you’re up for it, do all or part of the Valley Floor by bike. Or at the least, visit the Valley Viewpoint!
For your third day, choose another hike! It’s the BEST way to see the area’s beauty. Columbia Rock or all the way to Yosemite Falls if you’re up for the challenge. If you didn’t get to on a previous day, rent a bike and do the Valley Floor today for a more relaxed last day in the area.
RELATED: California Road Trip Itinerary: 19 Must-Visit Stops!
Yosemite Road Trip Tips
- I’ll mention it again, the park is MASSIVE. There are several other areas of the park that aren’t even mentioned in this post and you’re already driving an hour or more just to get to some of these spots. Take this into consideration when planning your Yosemite Road Trip.
- Parking is a B. Get where you’re going EARLY and plan to not really move your car. Parking is limited but there is a shuttle service that can help make seeing things a bit easier.
- Places to stay within the park are pretty limited and again—no matter what, you’re going to be driving 30 minutes to an hour to get anywhere unless you were able to snag a spot somewhere in the coveted Valley area! Make reservations and again, prepare to wake up early to get driving into the park to find parking.
- Don’t forget to buy an America The Beautiful National Park pass (if you’re going to visit more national parks throughout the year) or you can get the week-long pass once you get there.
- Be aware the roads are thin and windy. If you have a big rig this can be a hairy drive/you might not even be able to turn down certain roads. Unhitch your rig, bring a smaller car, or be prepared to use the bus.
- Avoid holidays and if you can, come during shoulder season! June and August are the busiest months.
- Try coming during the week to also help minimize the crowds, the weekends are, of course, the busier times.
- Cell service is very limited so make your plans, reservations, etc beforehand and always have offline maps available.
Where to Stay On Your Yosemite Itinerary
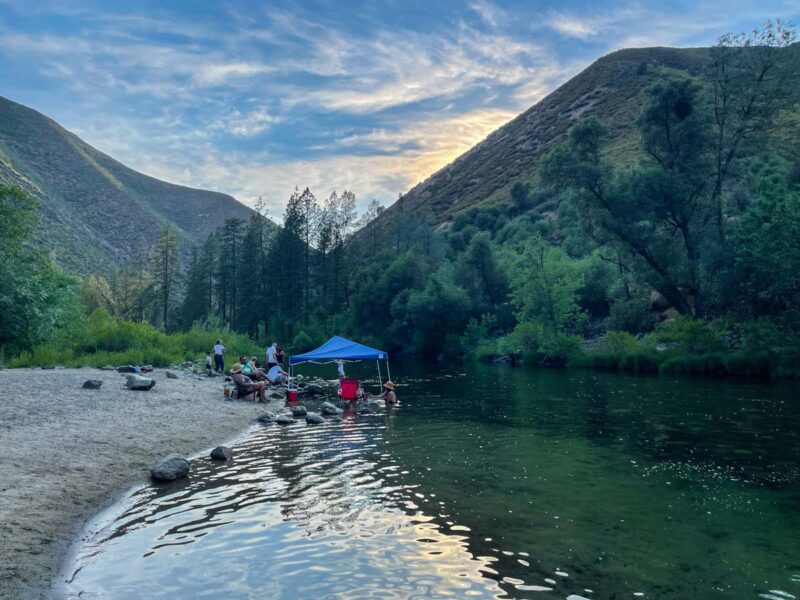
Yosemite Flats RV Park – Since we were road tripping in my friend’s RV, this is where we stayed. It’s one of the closest and cheapest places just outside the park! It was a great base for us. It was located just across the road from a beautiful river too! If you’re not camping or RVing…
Edna’s Hearts Desire – In the small town of Wawona, inside the entrance to Yosemite, you’ll find this delightful cottage. The one-bedroom cabin has a small patio and views of the surrounding forest and full wood paneling inside.
Yosemite Mountain Hideaway – This one-bedroom cabin can be enjoyed at any time of year. For summers there’s a private deck with stunning views over the valley below, and when it gets cold you can snuggle up by the open fire.
Sage Cabin – Here you can have complete peace and quiet, while still being close to the action – it’s just 15 minutes to the Valley floor. This one-bedroom cabin sleeps four and has a private deck with views over open meadows.